Diesel Diefet Kicked My Ass
|
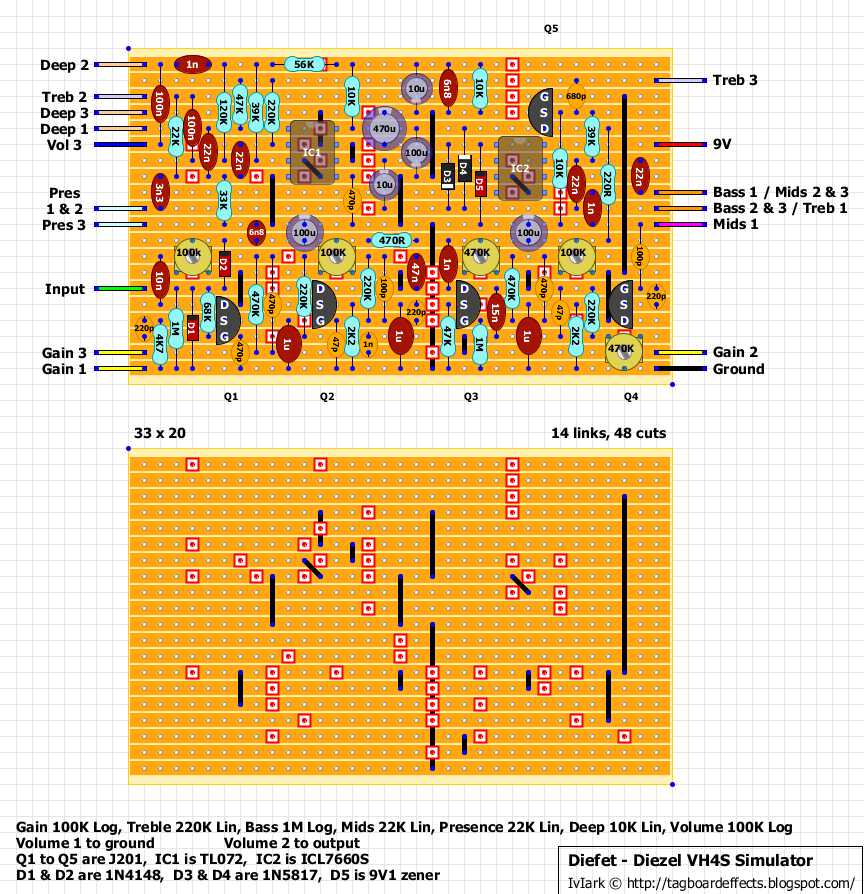
The Diesel Diefet has been pretty much a ball-buster for me. I think I missed a small solder bridge and misplaced a cap by one space, which had me blowing out pots. I got that fixed, but I am still not able to trace clean audio all the way through the circuit. It seems fine up the area of Q3 - then I lose a lot of signal.
The thing is - because I had the wrong voltage at an earlier stage, I don't know what else could be blown out now. I have already replaced 2 big caps (100uF and 10 uF) & the two IN4148 diodes. Should I replace all big caps? I could post pics but I don't think that is it - the thing is working now - just not getting enough gain. The EQ sounds amazing - a nice circuit. Does anyone know what the 470k trimpots do? (there are two and think they have different functions). I am sure the solder side is good - have triple-checked it.  Image files here: http://s1304.photobucket.com/user/Paul_Motter/media/DSC02995_zpsohw75dfw.jpg.html http://s1304.photobucket.com/user/Paul_Motter/media/DSC02997_zpsl3qmijhx.jpg.html http://s1304.photobucket.com/user/Paul_Motter/media/DSC02998_zpsdb30pjel.jpg.html |
|
One of the 470k trimpots seems to be for biasing Q3 (4.5V is the goal, I believe), the other (the one at the bottom right corner) is a third bass control, for reducing bass response before the signal reaches the tonestack. More information here.
A few questions: 1. I notice that some of your pF-range caps are physically very large. Are you sure about the values of those? I see one of them looks like mica, but the others look like they could be film. Just something to double-check, might be fine. 2. Where exactly was the copper bridge you found? It might help me figure out what could have gotten damaged. 3. Can you post a solder-side picture, just for reference? 4. Were D1 and D2 damaged, or did you replace them just as a precaution? 5. Did you use the trimmers to bias the J201's? 6. Any component substitutions? |
|
1. I notice that some of your pF-range caps are physically very large. Are you sure about the values of those? I see one of them looks like mica, but the others look like they could be film. Just something to double-check, might be fine.
They are mica - I have a lot of mica caps I got online as an assortment pack. In addition, I just got another load of film 470p caps. They are all correct values - the 240pf I took a 160 and added 68 in parallel. The only ones that are not exact values are where I used 43pf in place of 47pf. All 680. 470. 100 pf caps are correct value. 2. Where exactly was the copper bridge you found? It might help me figure out what could have gotten damaged. Good question. First recall that I had the right side 100uF cap down a row (both connections), I replaced that cap in the correct position. Solder bridge was at row six from top, the topmost cut of the three vertical cuts at 7:00 on the 470 uF cap in the circuit diagram. Additionally, yesterday I found that in trying to fix what looked like another solder bridge I made an accidental cut (now fixed) in an adjacent row. I didn't see the problem until I looked at the pic below blown up, you will see it unfixed. (sixth row from top - below right two vertical holes) I was continuity testing and kept getting a reading between those two adjacent rows, so I "went to town" - turned out it was the 470k pot bridging them ((long story) anyway - that whole area is now fixed - and I am getting sound through the circuit, just not gain. 3. Can you post a solder-side picture, just for reference? Here it is - just note that I already fixed two problems you might see . not proud of this solder job, but the copper was not lined up with the holes, so when I made cuts many of them left tiny slivers on one side. I never had that happen before so I didn't notice at first. http://s1304.photobucket.com/user/Paul_Motter/media/DSC02999_zps96xlz5pb.jpg.html 4. Were D1 and D2 damaged, or did you replace them just as a precaution? Just as a precaution, although when tested after removed one seemed possibly damaged (I think D2). The other tested ok. 5. Did you use the trimmers to bias the J201's? Yes, but once I plugged it in I found I could get a lot more gain doing it by ear, so they are now at max gain - not at recommended voltage 6. Any component substitutions? Just using 43 pf for a 47 pf cap, and using 500k trimpots in place of 470k. I don't trust those cheap trimpots much, though. I have seen them burn up before. Otherwise everything is to spec. |
|
I just wanted to say that I am seeing signs that this was a bad piece of vero. Not only can you see the holes are off center (on the last pic look at the top left) but I am now seeing spots where the copper peeled away from board where I made my cuts. I have looked this thing over and it is working, just not full gain. If I can't patch it up I'm just going to start over.
|
|
Starting over is probably the best option at this point. You can desolder and reuse components like sockets, caps, wires and use them on you new build so you don't have to throw out everything. (I've done this kind of harvesting on some builds that didn't make the cut).
One thing I always do now to avoid problems with bad cuts/bridges is to test every row on the bare verobaord with the continuity tester on my DMM. This is done after I have made all cuts to the bare board. I check every row and cut, and go through it twice. It takes a little time, but it definitely gives me some peace of mind. Also, when I solder, I check each joint visually and make sure no bridges were formed. Nothing is guaranteed but I've reduced my failure rate markedly with these procedures. |
|
I agree about checking each row right after making cuts now - I never had problems like this before but I will definitely do that from now on.
My soldering generally works pretty well, I rarely bridge anything by mistake. I just switched to more pointy solder gun, and I think a slightly duller tip flows heat a little better. But I can adjust. The scratches you see are because I use a light sandpaper after making cuts to remove particles and expose fresh copper. This was just a bad vero. Off-center and some of the copper lifted up by the cuts. |
|
I use an abrasive eraser like this to sand veroboards after cutting tracks - cause less damage than sandpaper, and they last for years:
http://www.ebay.co.uk/itm/x1-Abrasive-polishing-block-for-PCB-cleaning-copper-circuit-board-track-cleaner-/261759100822?pt=LH_DefaultDomain_3&hash=item3cf20ee796 I then use a loupe to inspect all my cuts, in case I have a sliver of copper left. If I have, I trim it off with a scalpel. then (and only then) do a continuity check. |
|
Administrator
|
That's a good suggestion ^^
I just hold my builds up to a window and clean up the cuts with a knife. However you do it, you shouldn't try to skip this step.. |
|
In reply to this post by Beaker
Beaker - I use 1500 grit ultrafine sandpaper on a flat sanding block to polish the copper traces and remove burrs and other things which could cause bridging. The 1500 paper will last a while and won't remove any appreciable mount of copper. I admit that I go overboard (no pun intended) on board prep, but again it has reduce my fails substantially. My main failures now are when I switch on the power, hear nothing, then realize I forgot to install the IC...

|
|
All good advice - thanks Beaker, Travis...
Yeah - also, how do you guys cut Vero when you don't need a full piece? I have tried hacksaws & shears. I now have a cutting blade for my drill, but my wife lost the bit that holds it on... Anyway - the plastic breaks if you don't cut it right. That was not a problem here, but I also think the plastic was old, because it chipped when I was just making regular in-line cuts in rows turning a drill bit in my hand. |
|
Dremel with a cutoff wheel for me. I use one of the diamond grit ones that doesn't degrade as you cut which is nice.
Through all the worry and pain we move on
|
|
Administrator
|
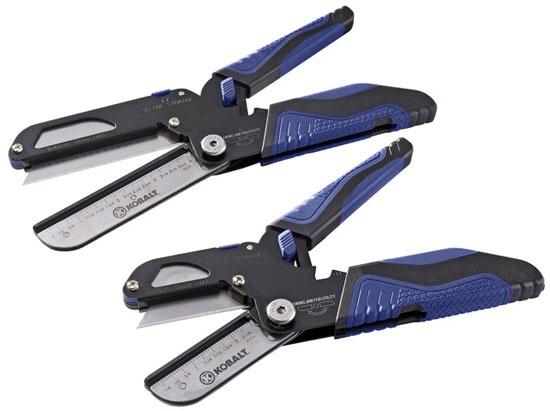
I just score the edges with an xacto, the use one of those cutters that is basically a razor blade in pliers. They look sorta like these:
 I get clean, smooth edges every time, never a problem. |
|
I use a coping saw (http://www.lowes.com/pd_152677-930-324CP9_0__?productId=1018541)
then use a file to smooth the cut edges and round off the corners.
Yeah, 220, 221. Whatever it takes.
|
|
In reply to this post by Frank_NH
Induction & all helpers here.
You know I am  just a determined novice trying my best to learn how all this stuff works by charging forward and learning from my mistakes. just a determined novice trying my best to learn how all this stuff works by charging forward and learning from my mistakes.
I really appreciate the help & patience. And anyone who looks at this process and thinks it is easy is wrong. Some people seem to catch onto it faster than others, but when you start at zero there are so many little things to remember that even when you understand them it doesn't mean you can retain them all - but the more you do it the more you get it. That's why I keep charging forward one day at a time. But Frank - I totally agree now on doing things right in the first place. If I had not misplaced one cap I probably would not be doing all this troubleshooting. And the bigger the project the slower you should go - because fixing it is a lot harder. One can get faster at building, even learning to measure twice & cut once. But still - the little things can make all the difference so it is impossible to be TOO careful. |
|
I'm always glad to help. (I love puzzles, so it's less about altruism than self-interest, really.) I can't say I really did you any good in this case, but it was worth a try. Let us know if you rebuild it or otherwise get it working.
|
|
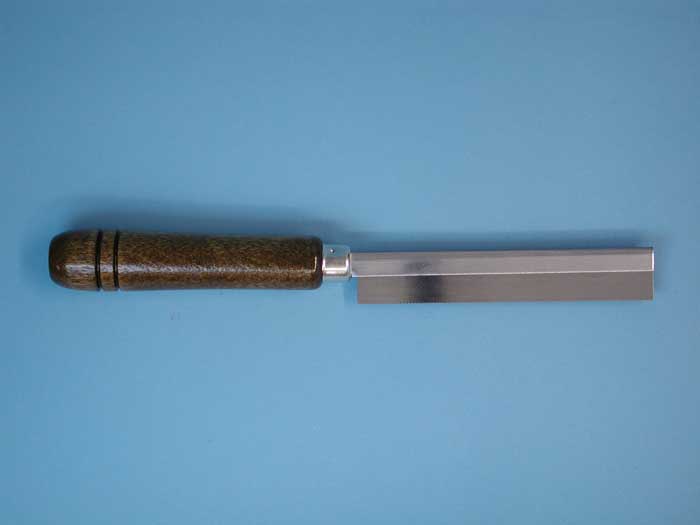
Here's the kind of saw that I use to cut veroboard (plastic or epoxy fiberboard style):
 I also use files or a sanding block with 220 paper to smooth the edges square. I mounted a square block of wood to my workbench to act as a riser for cutting and filing. Make sure to use a dust mask to prevent you from breathing in the board dust... 
|
Yes, this. That stuff is nasty and gets absolutely everywhere.
Through all the worry and pain we move on
|
|
So, I got this sucker working. I just replaced some of the 100u caps and the charge pump IC. I also noticed had tried to put two resistors is series for 120k but for some reason I BF'd and made it about 260k. I swapped out the charge pump IC, and I also noticed my breadboard wasn't getting any +9 and I don't know when that started (probably just before I saw it), but of course it worked for the first time right after I fixed it. But I don't think that was the only problem.
This is a VERY gainy circuit - almost too much - pretty hairy no matter what you do, but it still sounds balls to the walls on lead. The tone controls are interactive in an unpredictable way - if I go full bass and full depth I get oscillation. If I turn the treble full off I have no midrange control. The bass seems to be too much, even when full off. It is hard to tame this beast and get the hair out of it. The one thing I am missing is the 9.1 zener diode and I keep wondering if that is a problem. With a charge pump, I wonder if that was there for things that really don't want to see 18v. So - I had already started rebuilding it, about halfway done, and I guess I will go on and see if it turns out different. I will use fewer film caps. |
|
I was using my Les Paul before, but it sounds really spanky with my Strat - one of the best Strat sounds I have gotten here so far I would say.
|
«
Return to Open Chat
|
1 view|%1 views
| Free forum by Nabble | Edit this page |

