How to Build a Pedal Board
|
How to Build a Pedal Board
As a musician, I am always striving for the perfect tone. In looking for the perfect tone. As a result, I ended up with a huge pedal board. It got to be so heavy that it is really hard to set up and tear down every time that you use it. I decided that I wanted the functionality of all my pedals with my looper and everything combined. This is where my journey begins. In order to save my back, I designed a functional, light weight board. The Enclosure I started with aircraft aluminum for the enclosure because it is really light and very strong. With this material, you are able to have a larger but very functional board. 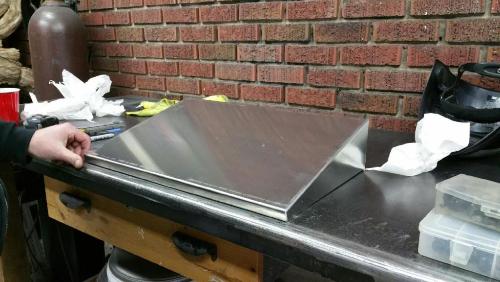 Drilling the Enclosure By using the above diagram, the holes are drilled. I chose to drill the holes so that I was able to fit as many pedals on the board while still being able to comfortably fit my foot. 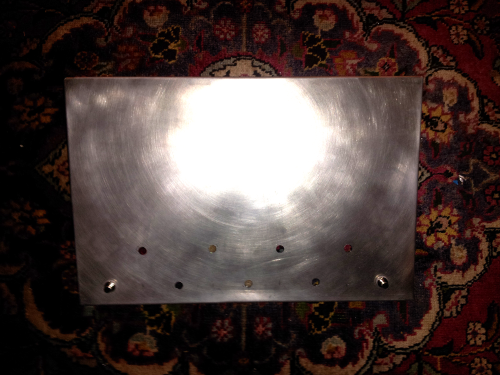 How to Wire the Pedal Board In the board design, it is important to make sure that there is a way to be able to access all of the pedal and reduce any tone degradation. I decided to use a true bypass approach. I found the following True Bypass Looper layout. It is located at tagboardeffects.blogspot.com. 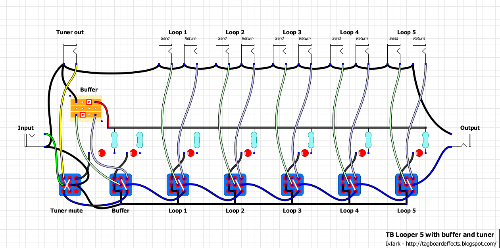 If you review the wiring, by replacing the jacks you can use the same in and out for the pedal that you are adding. You can even install a tuner if you like. Here is a inside gutshot of the board 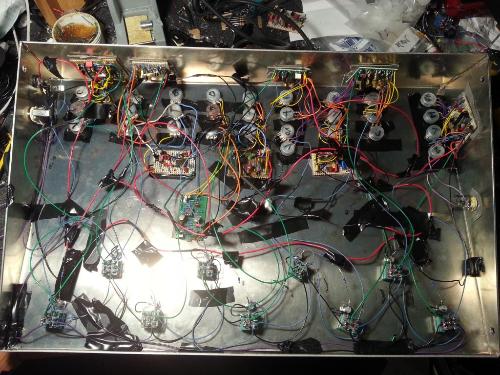 How to lay out the Pedal Board In order to get the optimum tone, the pedal order is very important. I usually start from right to left. I start with my compressor and then go to Fuzz. Next I put Distortion and then Overdrives before modulating effects. In my board, I chose to put a Sea Blue EQ after the "Dirt Pedals" and before the "Modulating Pedals". This is subjective to taste. Here is the completed board 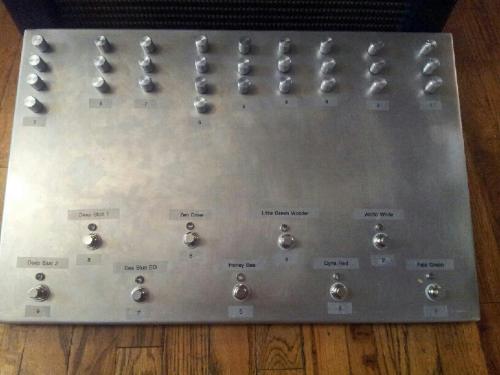 |
|
That is so cool, I gotta do that one day. Nice one.

|
|
Administrator
|
In reply to this post by Dennis Fox
Thanks for posting Dennis. This is definitely how I'd do it if I was building a pedal board, I think it's a great idea when you know exactly what you want to use, compared to having individual boxes.
|
|
Isn't this technically a multi FX and not a pedal board. With the latter I think of actual boards or frames on which pedals are placed.
Looks like an interesting build. I wish you lots fun rocking it. I could never do one like that. Not because I couldn't, but because I could never commit to a set series of effects. I always like to try new things. There's always something new and shiny. 
|
|
Thanks for your response. I just love this forum. I have learned so much here. I'm not sure what this board is called, but I really like it. Over time, I have learned what makes the tone that I like. However, it seems that over time, my boards kept getting heavier and heavier. I have 2 bards (pt3 and a PT pro) in conjunction, and thought "this is dumb" I only use a few pedals regularly, why am I doing this?". I saw David Gilmour's Pete Cornish board and had an ipiphony. At this point, it is very functional and sounds amazing. I love the BJFE tone and when I added the original along with the modded Deep Blue Delay, WOW. I love being able to pick it up and go with 1 hand when I play. The aircraft aluminum is so light. I have a second module being fabricated that will hold the tuner, volume pedal and Rocket Ride Wah and Voodoo Labs Power. If I don't feel like picking up everything, the board still will still sound awesome by itself. I will post more pictures.

|
«
Return to Open Chat
|
1 view|%1 views
| Free forum by Nabble | Edit this page |

