Inspecting the vero board

classic Classic list List threaded Threaded
4 messages Options
Reply | Threaded
Open this post in threaded view
|

Inspecting the vero board

gogiche
Hi people,

Maybe this is stupid and I have discovered a hot water with this ,
but I was in a situation when I had no sufficient light in the
room to solder so I grabbed a headlight and point it to the vero board...

I did my job and I have discovered an easy way for beginners to check their
soldering for bad connections or some soldering shorts bridges stacked between the
vero rows.
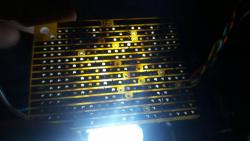


Hope this will help :)

Cheers
Gogo
Reply | Threaded
Open this post in threaded view
|

Re: Inspecting the vero board

Mulekicker
I do the same thing.  
Reply | Threaded
Open this post in threaded view
|

Re: Inspecting the vero board

Frank_NH
That's nice way to check.  However, what gets me sometimes are shorts across the track cuts caused by the ** tiniest ** little sliver of copper.  So, I also check every cut with my digital voltmeter, using the continuity setting.  If you hear a beep across the track cut (indicating continuity), then you need to check the cut.  I use an exacto knife to scrape off the copper slivers if need be.  Once the cuts check out, I'm ready to go with the vero build.
Reply | Threaded
Open this post in threaded view
|

Re: Inspecting the vero board

Zanius
No matter the size of the board I'm making I always run a knife through all the rows checking out for bumps or abnormalities and when I'm happy with that, I give it a good toothbrush scrape. Works every time