Maximum vero size for 1590A, 1590B, 125B, 1590BB

classic Classic list List threaded Threaded
7 messages Options
Reply | Threaded
Open this post in threaded view
|

Maximum vero size for 1590A, 1590B, 125B, 1590BB

makerie
I was wondering what's the maximum number of rows and width of vero people have gotten away with for 1590A, 1590B, 125B, 1590BB enclosures.

Did you have to do any special manoeuvring to get them to fit?
Reply | Threaded
Open this post in threaded view
|

Re: Maximum vero size for 1590A, 1590B, 125B, 1590BB

Travis
Administrator
The number of rows depends on how you mount your hardware, the size of the hardware, whether there's a battery or not, etc

I just checked the max widths for 1590B, 125B and 1590BB. I don't have any 1590A on hand

The max width for a 1590B is normally 21 columns. If you cut down the edges you can fit 22, but you may need to flip the board upside down and mount it close to the lid where the enclosure is the widest.

For a 125B is it's 23 columns, 24 if you use tricks

For the 1590BB it's 34 wide, 35 with tricks

If you used the 1590BB horizontally you'd have 43 wide, 44 with tricks
Reply | Threaded
Open this post in threaded view
|

Re: Maximum vero size for 1590A, 1590B, 125B, 1590BB

Beaker
Travis is right here as to the maximum length of a board - it all depends on how and where you mount jacks and switches, and what type of of jacks and switches you use. This means there is no set maximum length of board. Mount a switch in a "bad" position, and you could struggle to get a 10 or 12 row board in a 1590B box.

125B boxes are taller than a 1590B. In theory this extra height, means that with careful component and hardware management, it is possible to use the entire length of a box. The board would need to be mounted solder side down towards the floor. and with an insulating spacers between the box hardware and the component side of the board, and between the solder side and the baseplate.
Reply | Threaded
Open this post in threaded view
|

Re: Maximum vero size for 1590A, 1590B, 125B, 1590BB

makerie
In reply to this post by Travis
Thanks Travis, really appreciate the effort to measure it.
Reply | Threaded
Open this post in threaded view
|

Re: Maximum vero size for 1590A, 1590B, 125B, 1590BB

makerie
In reply to this post by Beaker
Yeah that's what I was wondering myself. I guess there is the theoretical max and then what you can get away with with the other off board components.
Reply | Threaded
Open this post in threaded view
|

Re: Maximum vero size for 1590A, 1590B, 125B, 1590BB

IvIark
Administrator
I've got 22 columns in a 1590B a couple of times mounted the conventional way on the back of the pots, but needed a bench grinder to reduce the overhang at both sides.  In most cases you wouldn't want to go more than 21 unless you have room to mount it turned 90° and probably upside down with the back of the board at the top.  That's the reason why I've tried to make sure the vast majority of the layouts are 21 columns maximum.
Reply | Threaded
Open this post in threaded view
|

Re: Maximum vero size for 1590A, 1590B, 125B, 1590BB

Travis
Administrator
makerie wrote
Thanks Travis, really appreciate the effort to measure it.
You're welcome!


IvIark wrote
I've got 22 columns in a 1590B a couple of times mounted the conventional way on the back of the pots, but needed a bench grinder to reduce the overhang at both sides.  In most cases you wouldn't want to go more than 21 unless you have room to mount it turned 90° and probably upside down with the back of the board at the top.  That's the reason why I've tried to make sure the vast majority of the layouts are 21 columns maximum.
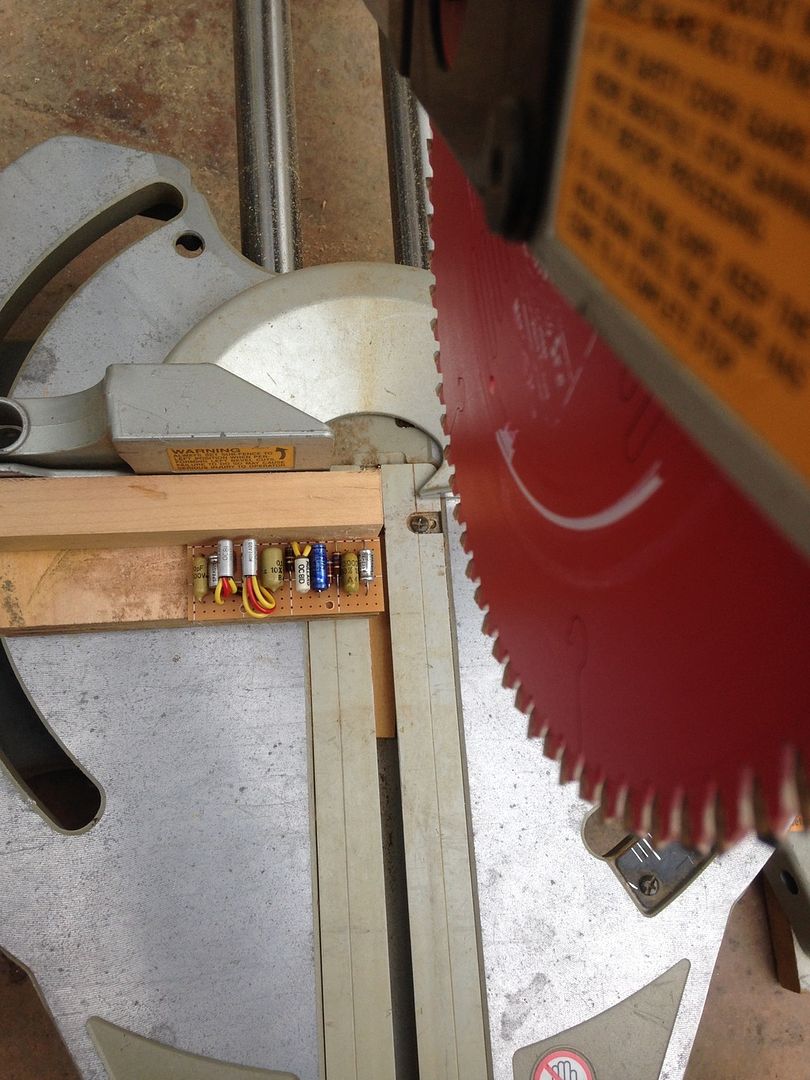
Yeah I stayed with your 21 column standard since 22 is so tight! It is possible if you cut the board right up to the holes basically haha. This is how I cut my boards down to width. Normally I would cut it before soldering in the components but this needed to be trimmed to fit in the enclosure

This always gives me a perfectly square and clean cut, without chipping the edge or requiring sanding to get a smooth edge


 photo 2CF86C3F-CF61-4854-BD2C-6C61EB99B47D_zpsengcs0ad.jpg