So I finally got a breadboard...

classic Classic list List threaded Threaded
11 messages Options
Reply | Threaded
Open this post in threaded view
|

So I finally got a breadboard...

Frank_NH
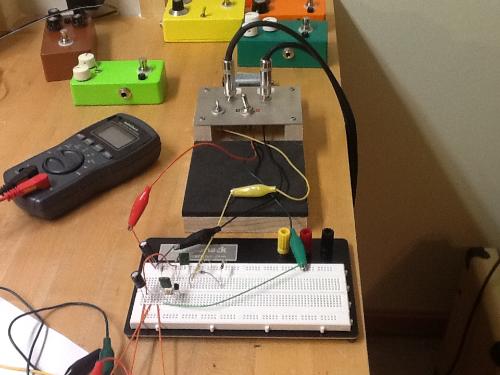
Yes, after months of fiddling with alligator clips and other improvisations to test out circuit ideas, I FINALLY broke down and got a breadboard.  Nothing too serious...just standard issue Radio Shack model.  I just got around to trying it out tonight and breadboarded the EQD Speaker Cranker.  After about of a half hour of fiddling with components and jumpers, it worked!  And it sounded very nice indeed!  Tried a few different transistors and diodes - I also may try putting a tone control on it, but actually it sounds pretty good just as it is.  Now, when I'm done, I can put the components on a vero and eventually box it all up.

So with the breadboard, I can "try before I buy", so to speak, although it will be more challenging to do larger circuits (considering the breadboard ends up looking like confetti and spaghetti!).  Next - the Tube Reamer!  

(If anyone has some breadboarding secrets they'd like to pass along, I'd be grateful...thanks in advance).
Reply | Threaded
Open this post in threaded view
|

Re: So I finally got a breadboard...

rocket88
Administrator
i have the same one you have......well actually i have 2 for those bigger circuits. i don't use them as much as i should, mostly when i'm creating something new rather then just trying them out, mostly because i get too much interference where i am and some of the fuzz/od/distortion circuits i build on it would have so much background noise i would just build them so i can box them and hear them clear as day.

but some tips i've learned is to try and keep things neat and cut jumpers for the distances i want, rather then predetermined sizes. this way i can easily trace what i'm doing and where i'm going. also, i found myself getting lost when i tried to do too much of a circuit at once, so i start at the input and move across to the output without interruption, then fill in different parts. it seems to be easier for me to think about it as a road map, so if i follow one path at a a time i know exactly what i'm doing.
Reply | Threaded
Open this post in threaded view
|

Re: So I finally got a breadboard...

alex.s
In reply to this post by Frank_NH
They always come handy breadboards!

I like to use them to audition parts and values, especially those I might intend to make switchable like diodes, tone caps etc. Just stick the wires that would be going to the switch in the breadboard and have a go. Saves you a lot of soldering desoldering and it means there's no need to socket parts in before committing them to the board.
Reply | Threaded
Open this post in threaded view
|

Re: So I finally got a breadboard...

Frank_NH
One thing I'm getting used to is translating the topology of the schematic (or vero layout) to the individual connected rows of the breadboard.  Each row represents a junction in the schematic.  I try to follow the general flow of the schematic, utilizing the side columns of the breadboard for +9V and ground.  But sometimes you have to jumper components that have to be placed physically too far apart.  I suppose that is part of the "art" of breadboarding.

One other thing I plan to do is to make some three wire cables with push-on connectors which will let me attach pots with solder lug connections to the breadboard without having to actually solder anything.  The one thing I dislike about my current build process is desoldering connections (like pots and switches) so that I can fit the board + pots, switches in an enclosure without too much wire hanging out (i.e. clipping the wires to the proper length after the fact).

I'm still playing with the Speaker Cranker - what a neat circuit!  Need more enclosures now...
Reply | Threaded
Open this post in threaded view
|

Re: So I finally got a breadboard...

induction
Good job getting a breadboard. I can't live without mine. (I actually have two.)

Beyond just the expense, people who are new to this hobby often resist getting a breadboard because they want to get to the finished product more quickly. Once you get one, you realize that now it only takes a few minutes to actually play through the circuit. Even the more complicated circuits can be breadboarded in an hour or less. So the breadboard actually lets you accelerate gratification instead of delaying it. Assuming you have enough parts, you can keep the circuit on the breadboard while you build and box it, so you can play the thing whenever you take a break from building it.

Breadboard tip 1: Make repeated steps permanent. Make small vero board with an input jack, adapter socket, and battery clip. Wire it the usual way so that unplugging the input jack or plugging in an adapter disconnects the battery. You'll be making the same connections for every build, you might as well just do it once and keep using it. Also dedicate a stomp switch to your breadboard. (I use a 3PDT toggle instead because it's easier to switch when it isn't mounted.) Wire it up as usual and label each wire (input jack, circuit input, output jack, circuit output, led -, ground) so you can quickly plug everything in without trying to remember which wire does what. If you're really ambitious, mount all of this stuff in a dedicated enclosure. (I'm too lazy for that, myself.)

Breadboard tip 2: Use the breadboard to test completed circuits. Once you've built the circuit, add the wires and leave them long enough to plug everything into the breadboard so you can test the circuit before you box it. I test mine with the same pots, switches, leds, etc. that I will use in the box. If you discover a bad part after everything is mounted, you'll have to pull it all out of the box to replace it. This step saves a lot of swearing. Of course, you can always build a breakout box for testing. Or so I've read. (Too lazy.)
Reply | Threaded
Open this post in threaded view
|

Re: So I finally got a breadboard...

Freppo
I can't live without my breadboard either. I use it all the time, breadboarding schematics, testing out my own ideas and when testing vero or pcb builds aswell.

I did a post in my blog about it. Might be helpful for someone
http://parasitstudio.weebly.com/building-blog/testing

cheers / Freppo
check out my building blog at www.parasitstudio.se
Reply | Threaded
Open this post in threaded view
|

Re: So I finally got a breadboard...

Frank_NH
Thanks Freppo. I like your idea of using trimmers on the breadboard for temporary pots.  I suppose it may be hard to get a feel for the sweep of the pots, but the sound should be the same.  

I do have my own version of the "test rig".  It's basically two jacks for input/output, a power switch (which activates a 9V battery), and a bypass switch (the smaller one in the photo) to flip back and forth between the effected and bypassed signals.  The interface wires are color coded (!) alligator clips (red = 9V, black = gnd, green = in, yellow = out).  Simple but effective.   I test all my boards extensively before attempting to box them.

BTW, that's the new breadboard in the foreground with the Speaker Cranker circuit.  

Reply | Threaded
Open this post in threaded view
|

Re: So I finally got a breadboard...

Beaker
Mycket bra Freppo! Thanks for the link - my set up is the same as your first version. Now I know what to do to improve it.

Off topic, but how is the summer up north this year? I do love northern Sweden in the summer.

Tusen tack,

Mark.
Reply | Threaded
Open this post in threaded view
|

Re: So I finally got a breadboard...

rocket88
Administrator
In reply to this post by Frank_NH
i've been thinking about building a "beavisbox" for mine to help make testing quicker easier, and help provide some shielding, from what i've been looking up it should be the cure. btw, you're test right looks great.
Reply | Threaded
Open this post in threaded view
|

Re: So I finally got a breadboard...

alex.s
A beavisbox was my first ever "build" and I've never looked back. Everyone should have one!

Upgrading mine next week with speaker terminals (the clip kind, to avoid having to constantly screw wires in and out) and a charge pump to test circuits at 18v in addition to the voltage sag pot I have now.

Makes it a joy to build, test and troubleshoot builds and breadborded projects.
Reply | Threaded
Open this post in threaded view
|

Re: So I finally got a breadboard...

Freppo
In reply to this post by Beaker
Frank_NH wrote
I suppose it may be hard to get a feel for the sweep of the pots, but the sound should be the same.  
I think that it's not problem to get the feel for the sweep with trimpots, but the downside is that they are only avaliable as linear taper. But that's usually not that important when testing. I know if most of the action is happening in the beginning of the rotation a log pot will be better, or a C pot if most of the action is crammed up at the end of the turn.

Beaker wrote
Off topic, but how is the summer up north this year? I do love northern Sweden in the summer.
'

Thanks. It's great! Super warm.. almost too warm. I just spent a few long days doing live-sound (FOH) at a large outdoor festival and the weather was perfect. :)
check out my building blog at www.parasitstudio.se