Well, let me inaugurate this section with a noob question seeking experienced advice.
I've already built 2 or 3 simple pedals, learning the struggle of boxing.
The method I used is solder a length of wire on the vero after finishing with all the components. Then calculate the distances and solder the pots, and then I stick em all in the box leaving jacks and switch last.
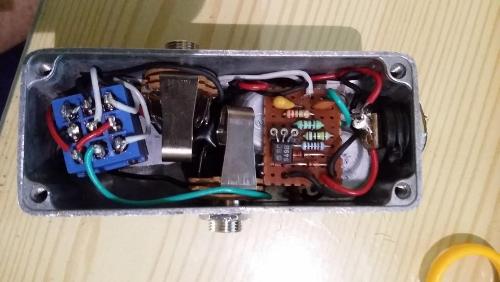
It works, but usually leaves a mess of cables like this:
That's a Green Giant btw.
So, how do you manage to solder the vero last, facing up without dripping solder all over the box or messing the rows?
Here's my way. I solder tue wires to the pots after the pots are in the box. Then solder them to the board allowing just enough to swing the board towards the top if the box. Like a flip top if you will. I run the rest of the wires under the board and solder from under not above like you have.
welcome to gfx, zanius, and congrats on your green giant build.
re your question, this builder's videos are pretty good in my opinion. i tend to follow the same approach.
basically i complete the vero stuff, with wires attached. i generally leave about 16cm of wire for each. i think it's easier and tidier to use a bit more than you need and then cut them down to fit the box, than make them too short and have to add wire later to bridge a gap.
then i test the board to check it's all working as it should by connecting it to a breadboard (ebay breadboard MB-102). that a really important stage new builders always want to jump 'to save time' (i did when i started and soon learned not to). but it doesn't save time at all.
first builds are almost always buggy, and if you've put it into a box and it isn't working, you don't know whether your offboard wiring is wrong or the board itself. so then you are juggling two things you don't understand at once, in a severely confined space. which ultimately takes far more time to solve in the long run, than dealing with both in their natural stages. so i never box an untested board.
then i plan out the enclosure (make sure everything including the board will go in with enough room so nothing is squashed or touching). mark it up carefully and drill. i'm too lazy to decorate boxes so never do. but this is where i would if i did.
then i work through the wiring bit by bit pretty much as the builder in the clip does.
i start with a lot of the stuff you can do before you even add the board. power socket, led, most of 3pdt (apart from input and output wires which are on the board), grounding between the jacks and pots, switches, etc. you can do at least half of the wiring before you even need to involve the circuit board.
then i fire it up and see what i've got. i've made quite a few pedals (though not as many as most here) but i'm still always surprised if it works first time. sometimes it does, but i never take it for granted and consider the offboard stage as just another thing i need to refine before i can calll it done. pots working backwards is something i am great at. missing a ground lead somewhere happens too. then once i've nailed all the little things it's done. until the next one.
worth watching the video and checking out the builder's other clips too, as he has made some useful ones that will help you as a newbie. they helped me anyway.
Truth is, after seeing this guide http://tagboardeffects.blogspot.gr/2012/04/vero-build-guide.html and seeing how Ivlark says he connects the board last, I thought this was the most common technique. I just couldn't see how it can be done, soldering the wires neatly while the board was upside down. Chriss' answer also covers how that can be done.
Also, i gotta admit I don't have the proper tools to work, e.g. I was using one of those to strip wire which prevented me to cut the wire exactly at the length and angles I needed to. I finally bought a decent one now and on my next build it should be easier.
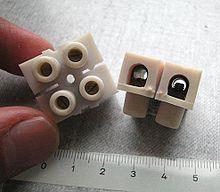
Also, due to the lack of a breadboard I just use these
for testing before soldering.
Thanks for clearing things up, see you at my next obstacle, lol :)