White letter in dark painted enclosure

classic Classic list List threaded Threaded
14 messages Options
Reply | Threaded
Open this post in threaded view
|

White letter in dark painted enclosure

zedsnotdead
hello guys!

well, the subject says it all. i just don't know a easy way to do it.
I mean, i can print the letters in white paper but then what should I do? cut them? That doesn't work too well.
See my aim is to do something like this:


Need some help here!

Much appreciated!

PS: I's love to ask and post comments on the blog, but to do so I must have a wordpress/AIm/etc etc account??? Can't I just post comments with this forum profile?
Reply | Threaded
Open this post in threaded view
|

Re: White letter in dark painted enclosure

Jederino
Print white on a projector sheet, iron transfer it on?
Reply | Threaded
Open this post in threaded view
|

Re: White letter in dark painted enclosure

GoranP
Not many printers can print in white.

I suppose one could print "white" letters on red background on an overhead transparency and then stick the entire thing on a red enclosure with white top and have the white be seen through transparent letters?

If you had that Brother label printer that John and Javi have, they do print white letters on transparent tape...

And also, I post in the comments using my gmail account. Other ones on offer are a bit on the obscure side but gmail is pretty mainstream.
Reply | Threaded
Open this post in threaded view
|

Re: White letter in dark painted enclosure

alltrax74
Yep, buying a tape printer with white on clear tape is the only way i see it as discussed in the other thread.
But i'm interested to see if someone comes with something else
Reply | Threaded
Open this post in threaded view
|

Re: White letter in dark painted enclosure

Madferret
In reply to this post by zedsnotdead
You could get some white water slide decal paper, if you use the same colour of red as the background layer on your image and leave the text whiter then the resulting decal would have white lettering. If you've colour matched the red correctly once applied to your enclosure it should give a pretty good effect. Try this stuff:

http://www.amazon.co.uk/Inkjet-Water-Slide-Decal-Transfer/dp/B00835TYU6/ref=sr_1_3?ie=UTF8&qid=1371466001&sr=8-3&keywords=water+slide+decal+paper
Reply | Threaded
Open this post in threaded view
|

Re: White letter in dark painted enclosure

alltrax74
Goog luck for matching the red...
Reply | Threaded
Open this post in threaded view
|

Re: White letter in dark painted enclosure

Madferret
In reply to this post by Madferret
Photoshop give an RGB value of #b41019, how accurate that is probably depends on how the white balance is set on your camera. It's probably a good place to start though, maybe do a test print first and go from there.
Reply | Threaded
Open this post in threaded view
|

Re: White letter in dark painted enclosure

alltrax74
Yes but anyway the printer will never give you the exact color photoshop is sending to the spooler.
I might be wrong but I'm sure it will just be a waste of ink
Reply | Threaded
Open this post in threaded view
|

Re: White letter in dark painted enclosure

GoranP

Same here... tried matching knob color to paper color and even though it's almost the same rgb value (picture taken of the finished product), the difference in material surface makes all the difference in color perception.

Not to mention that the printer indeed won't reproduce all the colors available to photoshop, like Alltrax says...
Reply | Threaded
Open this post in threaded view
|

Re: White letter in dark painted enclosure

Heath
This post was updated on .
It's a little more work, but all you really have to do is either use a spare sheet of decal paper (yeah, I know it gets kind of expensive) or some cheap photo paper, which should have similar absorption, etc. to the decal paper.

Get the color you *think* it is, make a swatch of it in photo shop, then lighten and/or darken a little bit, new swatch, rinse repeat.  

Print that out, but keep the file open in photo-shop (or whatever you are using).  You should have 2 dozen or so variations of the hue you are looking for.  Compare and find out which one matches most closely.  Open a new file (your actual graphic for the enclosure) and use the eyedropper thingy to select the hue that printed out closest to what you wanted.  

Voila.  

Also, if you make it an entire top graphic and use a black border, even if the color is off a tiny bit, it will either be unnoticeable, or look good that way (a la "I meant to do that... it's arty")

P.S. If you keep your swatches small, you can just reuse the spare decal/photo paper for the next project.
Reply | Threaded
Open this post in threaded view
|

Re: White letter in dark painted enclosure

induction
In reply to this post by zedsnotdead
Screen printing.

Not easy and doesn't lend itself to one-off builds, but that's how the mass producers generally do it.

The tape printer idea seems like an the easiest way to approximate it.
Reply | Threaded
Open this post in threaded view
|

Re: White letter in dark painted enclosure

zedsnotdead
In reply to this post by Madferret
So complicated....
Oh god... I might as well paint the damn thing by hand with a thin brush or something...
Reply | Threaded
Open this post in threaded view
|

Re: White letter in dark painted enclosure

Heath
Zed,

Yeah, I pretty much hate this part myself.  

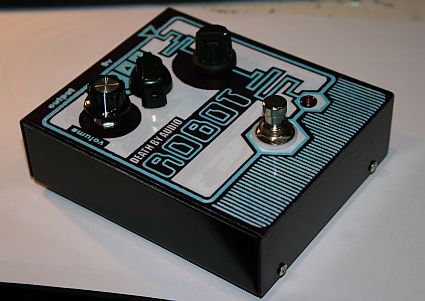
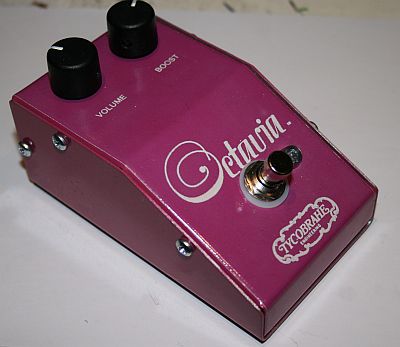
I've got about 20 pedals completely finished (drilled, filled, knobbed, and labeled/decorated) and it's funny to look at the first few I did and then the most recent.  HUGE difference.  It does get easier.  Honestly, I'm still in the "liable to fuck it up" stage, but I've managed a few decent results.

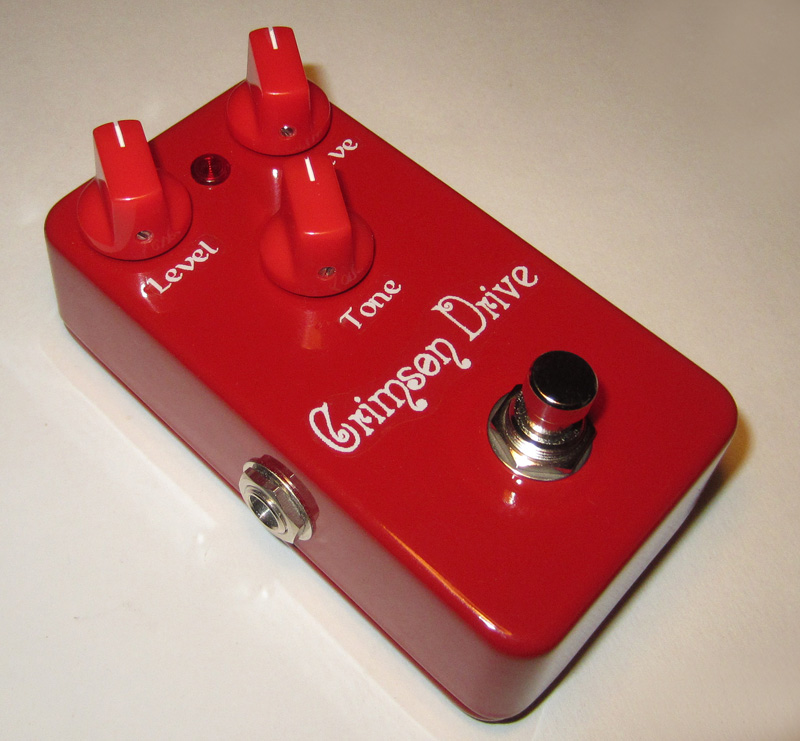
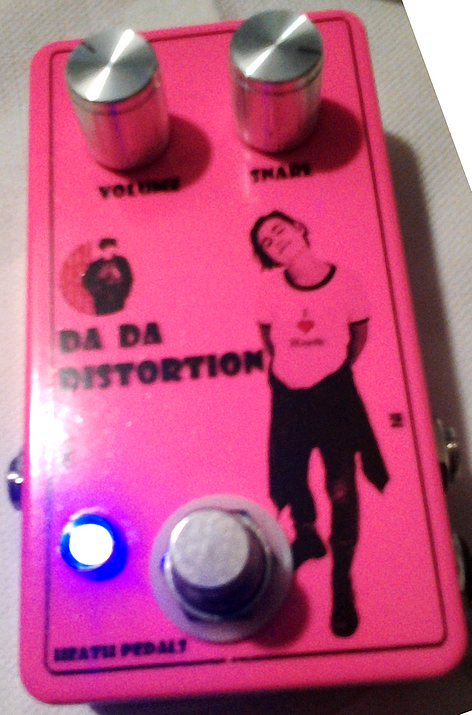
Here's a recent one using an inkjet water slide decal and clear coat:


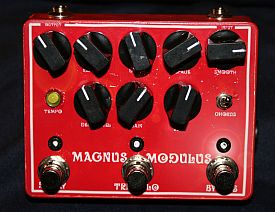
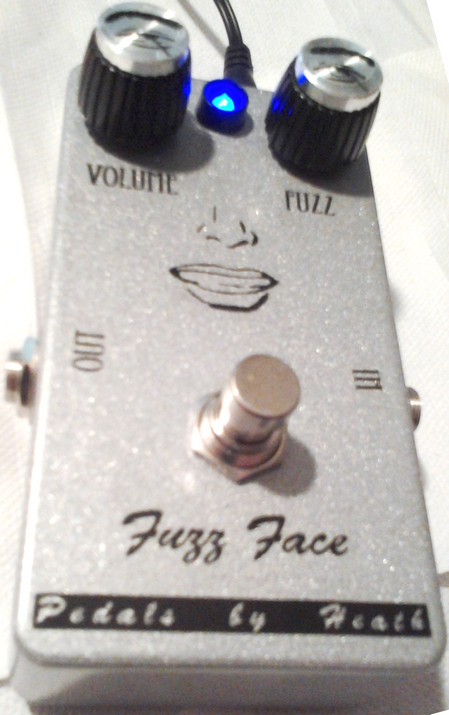
and here's one I made using a label maker (don't let the picture fool you, the edges of the labels are always fairly obvious when you have the pedal in hand, though you can spend a long long time building up layers of clear coat until it's all level.. but even then, in my experience the edges of the label are still somewhat visible):


Important lessons I've learned from using inkjet waterslide decals:

1. User a laser printer instead if at all possible.

2. There is a VERY fine line between "not enough" and "way too much" when you first clear coat your printed decals to make them water proof, so go gently.

3. Clear coat and let dry BEFORE you cut them out.  The cut-out edges, at least in my experience, let the clearcoat soak into the decal and paper making it really difficult to separate the decal from the paper after soaking.

4. After soaking and applying to the enclosure, don't rub it around too much or the clear coat will come off and your ink will run all over and you will cry.

5. ALWAYS use washers when installing your pots and switches to your enclosure after decal/clear coating.  It seems like common sense, but I like tossing the little white plastic washer that comes with my foot-switches... last time I tried that with an enclosure I had finished with decal and clear coat, as soon as I tightened it down, the nut ripped the decal and clear coat right up.  It sucked.  I cried.

6. It's FUN when it works right, and a friggin pain in the ass when it doesn't.  ;)
Reply | Threaded
Open this post in threaded view
|

Re: White letter in dark painted enclosure

JaviCAP
Administrator
In reply to this post by zedsnotdead
The better results I've ever had (still have not received the white on clear tape :( ) when dealing whith withe over dark has been printing the whole front in the most similar colour to the enclosures one, on a white water slide.

There's always a slight difference with the sides, but nos so obvious as if you just print a part of the front.

These are some examples:


The ink's expense is high, but I use compatible cartridges, not original Epson ones, and they cost 1/3 of the Epson's, so it's affordable.

BR