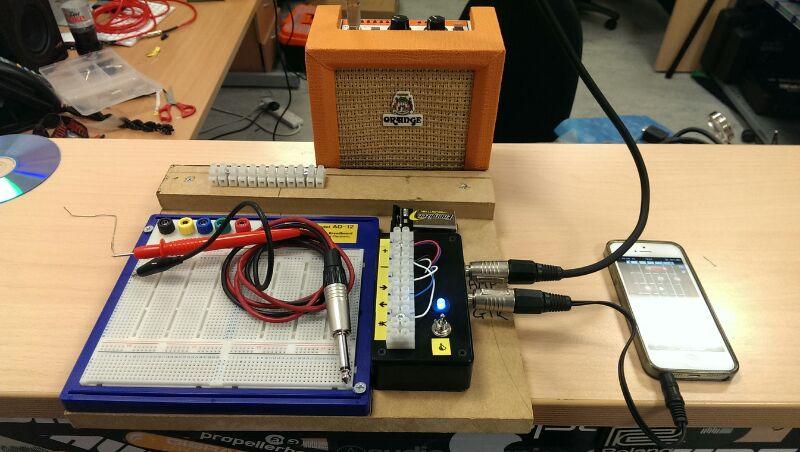
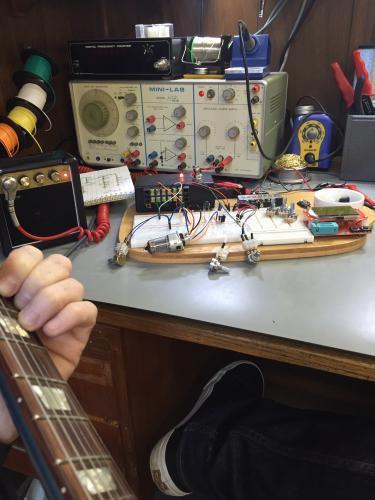
Took awhile but I finally finished my new Test Box based on Miro's V2. Only I added a few extras. It can now do the following...
Supply a test build with 9V or 18V (Zach's
switchable Charge Pump)
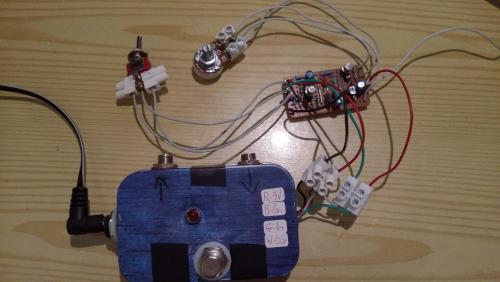
Input a simple 555 square wave for debugging/probing purposes (my own layout below)
Switch in a simple JFET
Input BufferSwitch in a simple JFET Output Buffer
Connect/switch in an Audio Probe
Hook up Test Build without any tools (finally!!!)
Finished product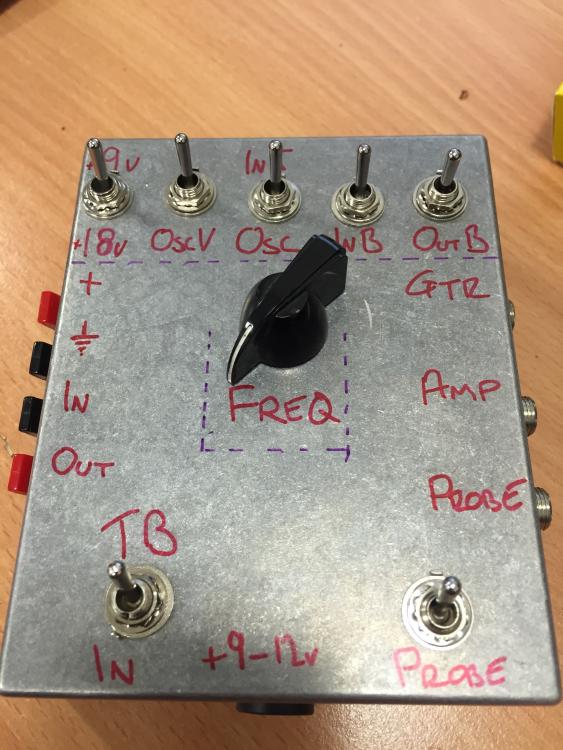
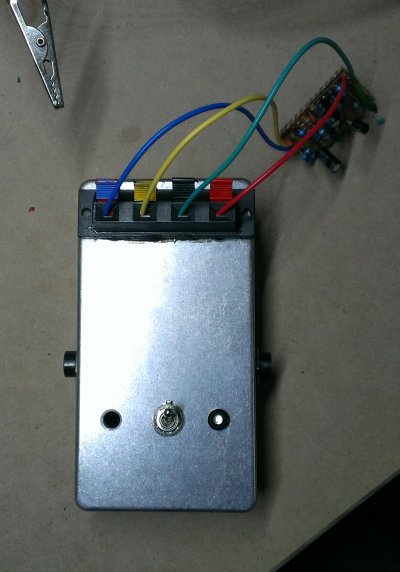
The switches top Left to Right. 9V/18V, Oscillator Power, Osc/In Jack, In Buffer, Out Buffer
Bottom Main Bypass, Audio Probe
Oscillator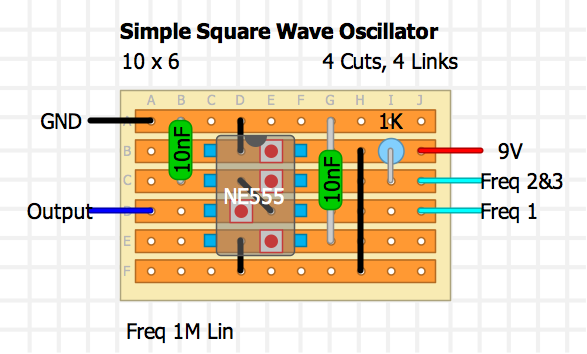 Wiring Diagram
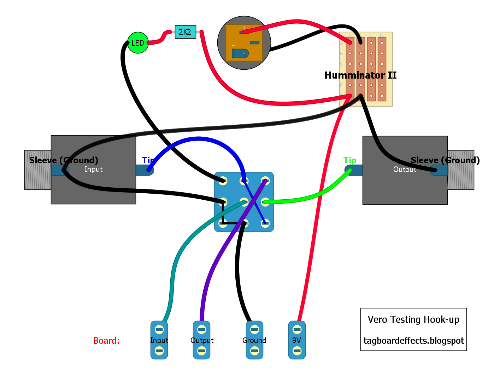
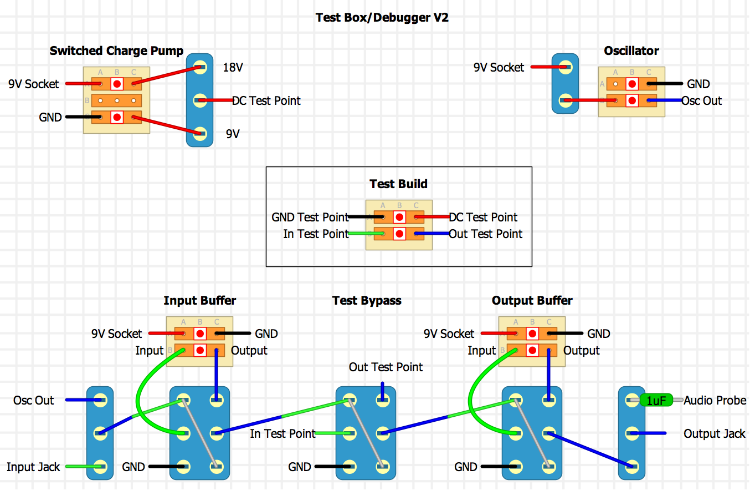
Haven't had a chance to use it yet but everything functions as expected. I was concerned the oscillator would bleed through hence the power switch for it. I wasn't concerned with LEDs but for anyone who may ask, just add a pole to each switch and wire an LED in the usual way.
Hope all this is any use to someone.