The way I make my pedals..
123


123
|
CONTENTS DELETED
The author has deleted this message.
|
|
Yup! If you want me to be specific then my girlfriend likes the brand "Daler & Rowney" the best. We have loads and loads of System 3 acrylic from them. Decent price and nice paint. If you're skeptical on the strength of it, paint it thick and/or do more layers!
www.pedalprojects.com
www.facebook.com/pedalprojects |
|
Alright so I've been experimenting with Dupli-Color sprays for about three days now. So first impression: Awesome!
I'm getting these cans for a really good price because I get them right from the guys who import them here in Iceland. I'm going to order lots and lots more tomorrow! I started out with a grey primer on all the enclosures and then I tried a few colours/effects that I got. So I got shiny black, metallic/sparkly green, neon orange, pink, chrome bronze, silver glitter, marble, granite and probably something else I forgot. Here are a few pictures: 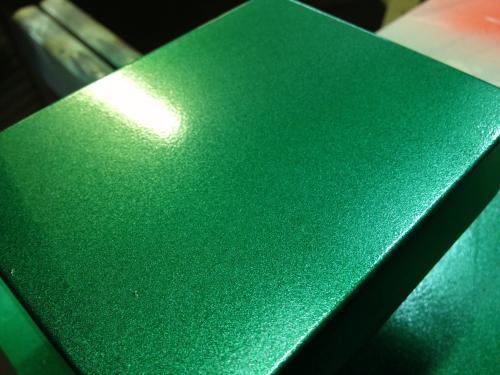 This one isn't perfect but I'm getting better results now after practicing. I just love the colour!! 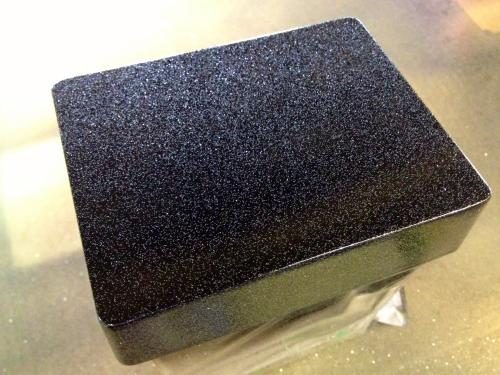 Here's the shiny black with the silver glitter on top. I like it a lot! 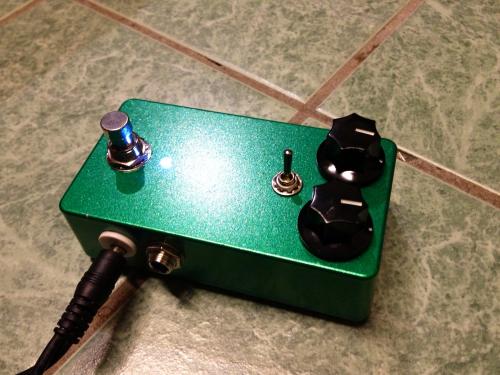 Here's a finished pedal. The enclosure would be called a "blem" but it still looks nice and it's only small stuff. I'm sure someone will be happy to use it! 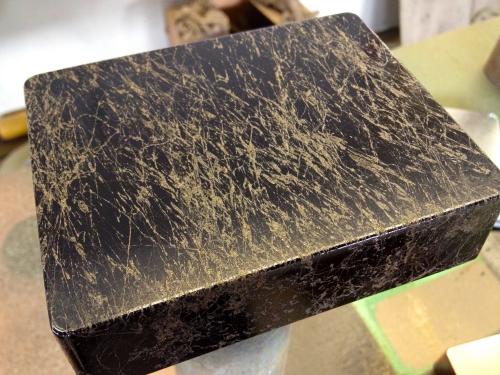 This is becoming one of my favourites. It's the "marble" effect. It's so weird. It's like spraying spiderweb out of a can! You need a colour underneath and then this comes on top of it. Looks friggin' cool in person! 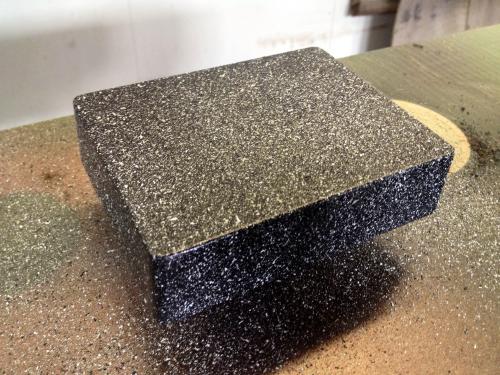 This is the "granite" effect. It sprays these particles all over and you can get them in different colours as well. I'm going to try them once they get more in stock. Actually looks pretty cool as well! 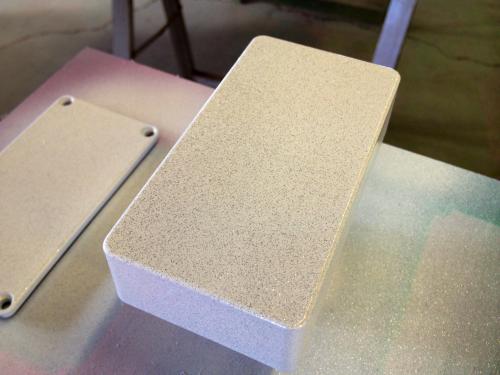 Here's a white with the silver glitter. I got clear varnish that I'm putting on all enclosures now and I'm really happy with the results. It makes the colours "pop" like they say, and obviously preserves it for longer as well. I'm still gonna have my girlfriend hand paint but I'm going to varnish them from now on.
www.pedalprojects.com
www.facebook.com/pedalprojects |
|
In reply to this post by Geiri
CONTENTS DELETED
The author has deleted this message.
|
|
I'll have a look what it's called. Can't remember at the moment. It's in a spray can though and I do a few layers of it for it to work properly.
www.pedalprojects.com
www.facebook.com/pedalprojects |
|
Those look real cool!
I've done a few experiments with enamel spray paint over the last few days - the finish is nice when it dries, but i'm having right trouble trying to get it on evenly and without blemish. The lids aren't too bad, but the boxes I seem to end up with patches where it's too thick on the top, and then running or unevenness down the side... Ian |
|
Without seeing the pictures, I'd say you are spraying it too thick. |
|
Yes, I think I am - just by the time you've done the sides and some has got on the top, I seemed to end up with lots of it, despite trying to keep it thin!
I'll have to practise some more I think!! Ian |
|
CONTENTS DELETED
The author has deleted this message.
|
Re: The way I make my pedals..
|
In reply to this post by ichilton
It's always good to spray in many thin coats, at least after the first layer. Don't get too close as the spray will mottle the surface with it's pressure. Don't get too far back or your spray droplets will start to congeal before they get to the box. Let the paint dry to specs on the bottle; you're going to get a variety of lame problems if you spray too fast.
You can color sand with very high-grit sandpaper (+300) and a little water after it's dry to remove surface flaws, then hit the area with a light coat of spray again. There's a lot of patience in spray painting properly, and I haven't worked with surface-effect paints like those pictured... The same would apply to clearcoats. Two or three thinner coats at the proper distance, with plenty of time between coats. Anyone tried etching? I've been seeing a lot of info about using simple vinegar to do it. One guy hooked a car battery charger up to a sponge and etched a knife blade in less than 5 minutes. |
I've done exactly two etches (pictures below). Although you can basically call it a success, it's just too much of a hassle. Firstly, people seem to be able to do a toner transfer using glossy inkjet paper, magazine paper, overhead transparencies, whatnot. Tried it all many times but couldn't get a transfer at all. Done all sorts of things to the enclosure, used many irons, nothing. These two were made using pnp blue transfer paper (expensive moneywise) and wetsanding the enclosure up to 1200 grit (expensive timewise and elbowpainwise). Also, I've etched them with ferric chloride (FeCl) and it seems that there's some EU directive in effect that prohibits the sale of it because for the life of me I cannot get it anymore either in my country or a few others nearby. It is apparently being replaced by sodium persulphate and I cannot see that as an improvement, ecologywise. Yes, it's less smelly but it takes higher temperatures to work properly and it's not reusable. sodium persulphate doesn't react with aluminum at all so there's that. I tried using 25% Hydrochloric acid (HCl) to etch aluminum, but it's a very violent reaction, lots of grey foaming and the stench is really something. It does etch but I don't think you can do fine detail like you can with FeCl. Maybe if I watered down the acid but I didn't really feel like it due to all of the above. Just too messy. So I'll be trying spraypainting next, without baking because I simply lack the facility. I'm looking at primer spray+color spray+waterdecal+clearcoat. Here we go: Zendrive 1 Zendrive 2 Black65 1 Black65 2 |
Re: The way I make my pedals..
|
ooh, those are niiiiice.
I've found a few youtubes on the subject, including one that really interested me. The guy hooked a battery charger up to a vinegar-soaked sponge, and etched a logo into a knife in the space of a short video. In another thread, there was mention of using spraypaint as the asphaltum for etching, scribbling the design through that and etching as normal. or, as the electro-etching guy did, blue tape with the design cut out of it. Let me reiterate; those are nice boxes. |
|
Thanks man! I may return to etching if I fail even more at spraypainting... we'll see. This is nice and is actually pretty simple if you are able to to it on the cheap (I was never able to). It certainly turned out waaay better than I ever thought it would. :) |
|
I do spray painting with mixed results, most bad ones are just due to lack of patience in all honesty. My tip is have a look in pound and 99p shops, they do nice cheap spray paint for cars or arts and craft applications.
Thanks Dave |
 Just finished this one today. I got a sudden order from the guitarist of Retro Stefson, which is currently one of the most popular bands in Iceland, and they're about to go on tour for a month on sunday. It was primered to begin with, then handpainted with metallic blue acrylic paint. On top of that it was sprayed with a silver glitter spray and a golden marble spray (very cool effect). Lastly the logo was hand painted and then clear sprayed on top. I like it a lot! It houses a Woolly Mammoth.
www.pedalprojects.com
www.facebook.com/pedalprojects |
|
CONTENTS DELETED
The author has deleted this message.
|
Cool, thanks! We might try that one day.
www.pedalprojects.com
www.facebook.com/pedalprojects |
|
amazing looking finishes, Geiri!
I've been spray painting a few boxes and after some practice I get good results. However, do you know a way to have a transparent color with spray paint? Is your silver glitter spray paint the Dupli-color Effex? thanks for all the good info, everybody! |
|
In reply to this post by Geiri
Am I reading this right when you say you populate your circuit first and bend all leads so they stay in place? Do you solder your leads down in a bent position and then trim off what is left over? I know this would work, I just thought bending leads down was not the recommended method - that a lead should pop up straight through a hole and get surrounded by solder on all four sides.
I know that way saves time and I have done it without problems - but in general I always try to keep the leads straight - and trim them down before I solder them in. Yes, it is harder (they can fall out so you need a way to hold the components in place while you solder). I have seen other people say the populate the whole board first, also. I am just wondering what is done by different people. I know by looking at your setup that you have been doing this a long time and you definitely know what you are doing. |
Masking tape. I do my boards individual components at a time, it takes longer but I'm in no hurry.
Through all the worry and pain we move on
|
«
Return to Open Chat
|
1 view|%1 views
| Free forum by Nabble | Edit this page |

