Anti-Show your Pedal guts Thread - The Tragedies...
12


12
|
We've all been there... the circuit just got the best of us. Sometimes it's taking on a layout that's bigger than our current skills. Sometimes it's a relatively easy layout that just defies you for some inexplicable reason. Maybe your shit just blew up or melted (don't lie, I KNOW this has happened to some of you).
But sometimes... yes, sometimes, the circuit is just evil. And when that happens, you have to kill that fucker quick. No mercy: R.I.P. Little Angel Chorus, 3rd attempt: 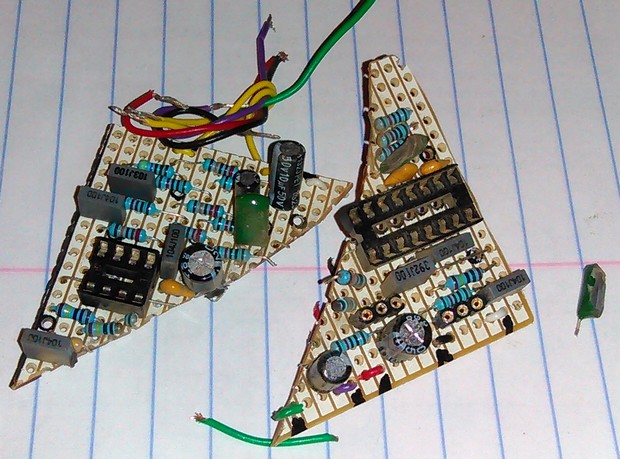 May your rotten soul remain forever banished. And so I open this topic, based on Tabby's idea, to record your failures, your tragedies, your lowest pedal building moments. Tell us your story, show us pictures, let the poison out and the sunshine in... and bonus points to the first person who photoshops in a monkey sexually violating their failed circuit. |
|
Administrator
|
Haha
I fully endorse this thread. |
|
Administrator
|
In reply to this post by Heath
:o
 These are mostly old boards from my beginning days and now when I pull one out I usually spot the error right away, but at the time they were frustrating or just didn't make the cut |
|
Dude, I'd be salvaging the living shit out of that stuff!
|
|
Administrator
|
ugh. now i'm going to have to look at my tragedies and take a pic. in any event this has now been pinned.
|
Re: Anti-Show your Pedal guts Thread - The Tragedies...
|
we don't talk about those colossal f.ckups. ever. lol
does this include getting a super nice enclosure all done and finished but then realizing that you drilled one too many holes and mislabeled something right when you're ready for final assembly? |
Been there, done that, got a few gap-toothed pedals to prove it :D How about getting drill happy and drilling that LED hole the size of your pot holes? Or my favorite, you design your gorgeous waterslide decal labeling the knobs and realize, when it's ALL put together, that the knobs are big enough that they cover most of the label. Makes for a sooper-noobish looking pedal, heh (actually I have that very screw up about to post to "pedal guts" soon, muhahaha). BUT, the cake goes to.... being away from pedal building for a while, coming back, laying out your board, cutting the tracks, laying all of your components in, soldering your happy ass off, then testing... nothing... oh.. wow.. you forgot to do the links. 
|
Re: Anti-Show your Pedal guts Thread - The Tragedies...
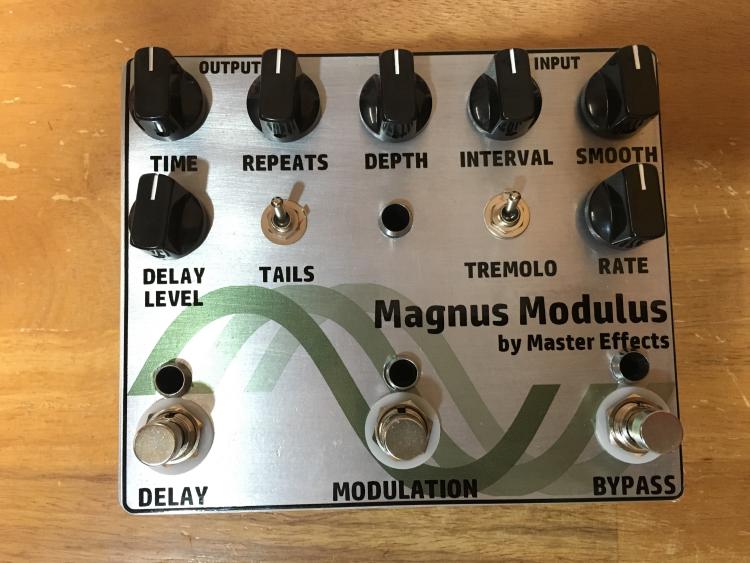 Stupid me doubled up the tails and delay stomp for this Magnus modulus. I'm hoping to figure out how to still make it work with the extra switch. |
Re: Anti-Show your Pedal guts Thread - The Tragedies...
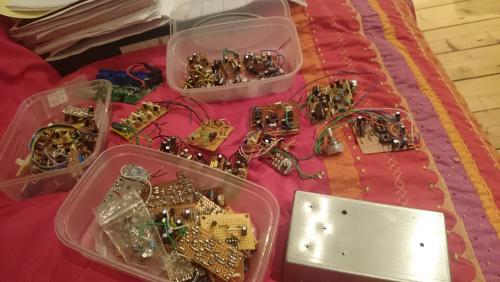 I imagine everyone has half a dozen boxes of dead vero, don't they? Plenty of YASFs, aka Yet Another Shitty Fuzzes, a number of "didn't work/can't be arsed to debug"s, the classic "let's attempt an unverified Boss slow gear for a third ever build", and the perennial "sounded great on the breadboard/sounds shit now it's boxed". Notice also the lovely (and not uncostly) classic sloped retrofuzz enclosure that claims to be made of steel but three broken drill bits are adamant is actually a titanium/molybdenum, high strength, military-grade bombproof alloy. Re: rage-snapped vero - I have only once lost control of my rational sensibilities once with vero, when I blobbed across the tracks of a particularly involved layout, and then spent a good while carefully smearing more and more solder across tracks THAT WEREN'T ORIGINALLY BRIDGED, more and more, until it resembled more of a giant puddle of solder than a pedal circuit, and in moment of pathetic squawking rage stabbed the bastard through the middle with a screwdriver... after discovering I had also jabbed a good few cubic centimetres of wood out of the kitchen table, I then spent the next hour or so with a tube of superglue and some woodshavings trying to ensure I wouldn't have to explain things in the morning. |
Bwahahaahah! Been there!!! I remember once (yeah, right) I cut a track at the wrong place and tried to solder glob it back together. Of course well all know that solder only sticks to what solder feels like sticking to and it rarely takes your feeling into account. So I'm solderglobbing everything in the vicinity of the mis-cut track except the mis-cut track itself. I'm solder sucking and wicking for all I'm worth while still trying to get that rack back together. I tried a little piece of copper shielding tape. Nope. Tried a left over snip from a resistor, but it tended to cling to the solder tip or scoot sideways, soldering to the wrong stuff, every time. I finally gave up when the board material began to blacken and the surrounding copper tracks were separating and curling away. ===================== Anywhere, here is a fail... I don't even have words, except to say that sometimes the part of your brain that recognizes failure (the "Well, Fuckit" part) and the part that is supposed to get that signal and stop trying to fix it (the "Hold my beer, I got this..." part), they don't get that message sent and received fast enough and Fail becomes Epic Fail. 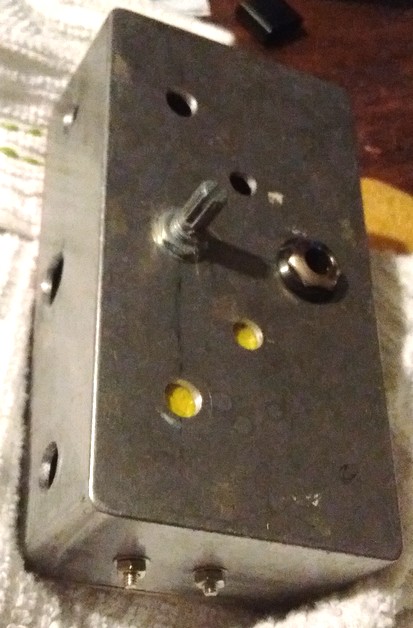
|
|
In reply to this post by Heath
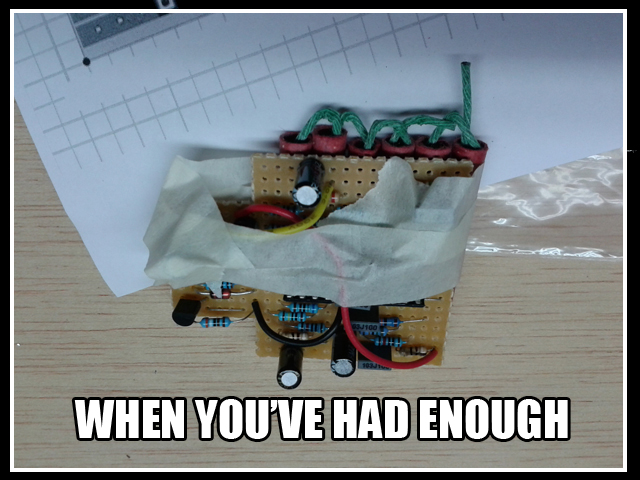 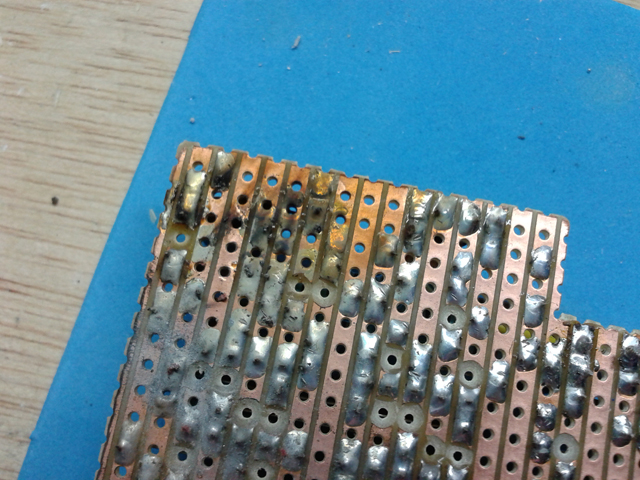 This was a clone of the SS-2 that I just couldn't get to stop oscillating. Damned thing wouldn't even blow up properly. 
|
I'm just going to go ahead and pass the Crown of Destruction over to you. That was beautiful... |
|
In reply to this post by BuGG
Nice!
Wish I would've taken a photo of my 2-knob DBA Audio Soundwave Breakdown attempt that started on fire three separate times http://guitar-fx-layouts.42897.x6.nabble.com/Early-2-Knob-Death-by-Audio-Soundwave-Breakdown-tp28048p29143.html |
Re: Anti-Show your Pedal guts Thread - The Tragedies...
|
In reply to this post by Heath
Can't figure out why or where it's grounding out? Fix it with tape! And foam. And tape.
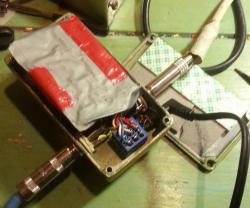
|
|
Administrator
|
Devi Ever style

|
Re: Anti-Show your Pedal guts Thread - The Tragedies...
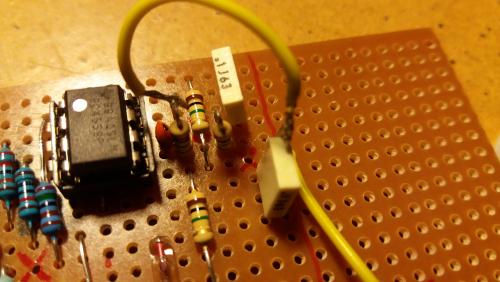 Decides to build parallel compressor using split'n'blend. Remembers that many compressors invert signal. Cunningly decides to use redundant half of 4558 in nice Orange Squeezer layout from here as inverting buffer. Completely screws up layout of added buffer resulting in horrible flying leadery. Misses one board cut resulting in 4 hours debugging. Finally gets it working... ...then remembers that Orange Squeezer is a compressor that DOESN'T invert. Some days you just can't win. |
|
I hope I haven't angered the vero gods...
My first attempt at a perf layout...and last. What a PITA! I figured I would eventually get the hang of it, but disliked the entire process.  And it just felt wrong. And it just felt wrong.
By the end, I knew if it didn't work I wasn't even going to attempt to troubleshoot. This was supposed to be the Hamlet Delay. Turned out with a very low output and when I adjusted the tone control I got smoke. Went right in the trash, 4+ hours down the drain.  Never again 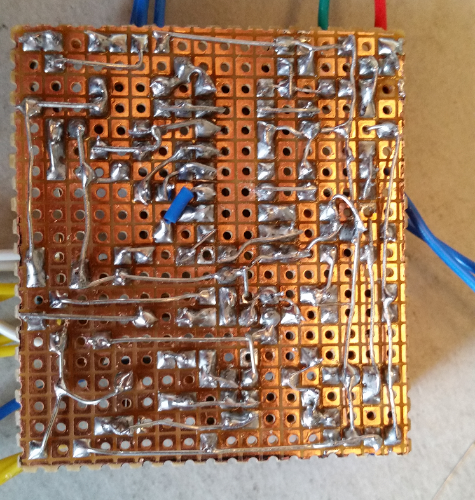
1978 Gibson Les Paul Standard, Cherry Sunburst
|
Re: Anti-Show your Pedal guts Thread - The Tragedies...
|
This post was updated on .
This just happened to me tonight.
Painted the box to rehouse a vintage boss oc-2. Colour match bang on. Put some painters tape on and drilled it. When I took the tape off, the paint came with it and left the primer behind... Wtf. Same brand of paint that I normally use. Never had a problem with this paint/primer combo. I am sad. 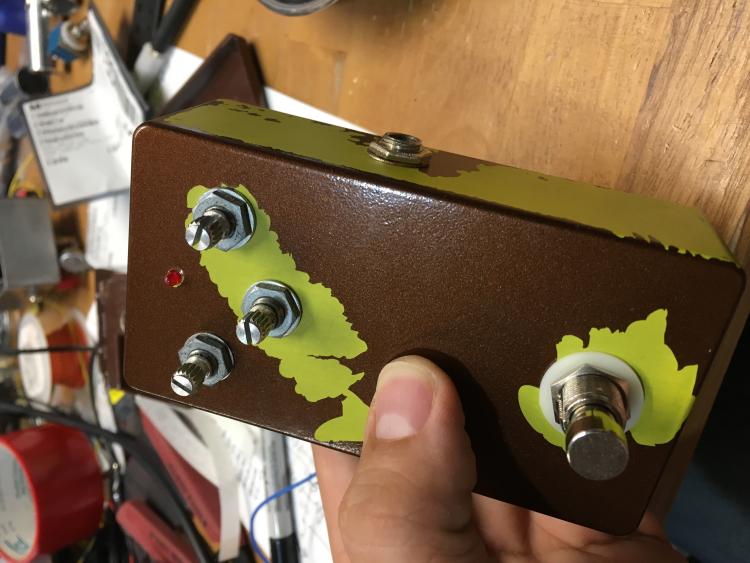
|
Re: Anti-Show your Pedal guts Thread - The Tragedies...
|
This pod ampeg scrambler refuses to work.
Used the tonelad layout and I flipped c3 , quadruple checked all transistor pinouts and cut between all traces. Still won't work 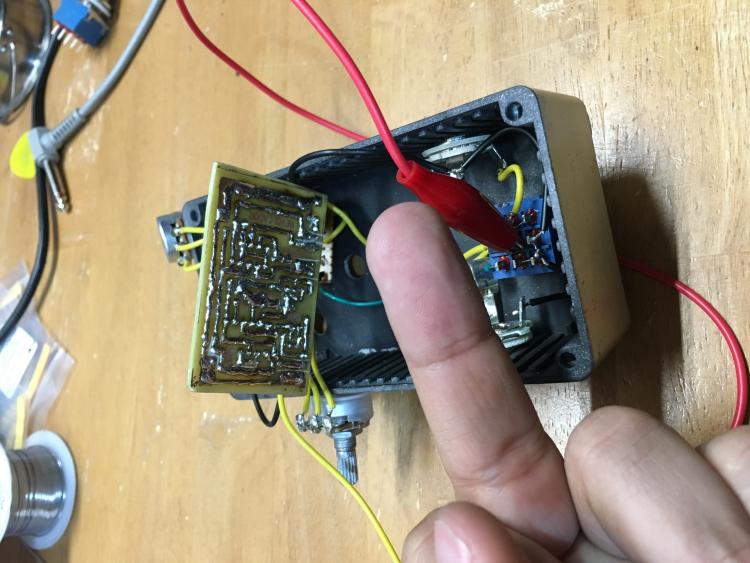
|
Re: Anti-Show your Pedal guts Thread - The Tragedies...
|
This post was updated on .
Sorry to bump this old thread but I had to let off some steam.
My only job this afternoon was to built a tiny little 2-JFET boost circuit. Not design it. Not get it in a box. Just solder up 14 components and give it a quick test. Here's how that went. Bear in mind this is a 10x6 vero, and while I'd still call myself a relative beginner this shouldn't be a hard challenge. Attempt 1: Made a DIYLC layout, cut the vero, drilled out the cuts, populated the board. Did the wiring. Tested it -- disappointingly quiet and muddy. Poked about, inspected. Realised I'd confused 10k and 1k resistors on the second gain stage. Desoldered (yay! solder sucker!), clipped, fussed to get the bits out, swapped the resistors, resoldered. Test for bridges -- looks tight. Nice. Tested again. Still sounds weak. Crisis of confidence: were they wrong on the second gain stage or the first? Of course I've used the components off the breadboard for the build, because I'm that cocky. Back to schem. Yes, the first stage was wrong, not the second. Now I have 4 wrong resistors instead of 2. I rebuild it on the breadboard, which confirms my suspicions. Out comes the solder sucker, off come all four resistors. New ones go on the right way round. Check which is which about 100 times before soldering each one. Done! Except now of course I have some solder bridges to cut out. Still not working right. I look over everything again. Yes, folks, in between drilling the cuts on the vero and starting to populate the board, I'd rotated it by 180 degrees. Somehow this never came up during the disproportionate amout of time I've spent looking at the thing. I know when I'm beaten: in the bin it goes. Attempt 2: Cut a new piece of vero. One column too short. Attempt 3: Cut a new piece of vero. Count the columns 3 times. Drill out the cuts. Start populating the board. Something is amiss. At least I notice this time. What I've done is drill the cuts in a mirror image of how they're supposed to be. Bin. Some days you have to know when to hang up the iron and go and sit in the garden. [UPDATE: Attempt 4: After posting my rant and having a cup of tea, I felt like I wanted to put this thing to bed before dinner. So I did everything very carefully this time, although in the process I did manage to stub my toe, toast a JFET and spend 5 mins testing without the guitar plugged in (I promise I'm not making any of this up). Now I have a board that looks 100% correct but produces almost no sound. So the very real possibility is that I've been building an incorrect layout all along. More tomorrow!] |
«
Return to Open Chat
|
1 view|%1 views
| Free forum by Nabble | Edit this page |

