Milkit's enclosures. CRAZY DEALS!!
123
123
|
Oh right, my fault! Sorry about that. Didn't mean to make you look bad or anything!
Thanks for clearing it. Can't wait for the rest. They're a little smaller than I expected but that's awesome. They look great! 
www.pedalprojects.com
www.facebook.com/pedalprojects |
|
Nah no worries dude, I didn't take offence! ;0) Regards, Matt.
It's better to have it & not need it, than to need it & not have it!
|
|
Administrator
|
In reply to this post by Milkit
Hi Matt,
Just to let you know, I've used the first enclosure from your lot :P Wanted to build something really vintage to fit these Airbuses 380 :P So I thought the best option would be a Triangle Big Muff. Polished the box, varnished and after did use a medium grade sand paper to crate some little scratches, dings and so on. I think it looks just awesome! and plenty of room inside, you could fit an elephant there!. Used your enclosure, Mark's vero and Big MUff PiTriangle 66 V.6 components. Sounds incredible and looks like a 40 years old pedal, I'm in love with it! Thanls again for these great enclosures! 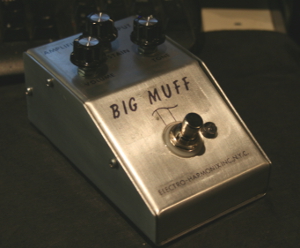
|
|
Administrator
|
Nice one Javi, looks awesome
|
|
Administrator
|
Thank you very much Mark! I think this is the first time I feel really proud of a finished enclosure :)
|
|
In reply to this post by JaviCAP
Ah wow, that looks awesome Javi! I'm really pleased that you like them, you've done a fantastic job on fettling that badboy up dude! Great work buddy. Matt.
It's better to have it & not need it, than to need it & not have it!
|
|
In reply to this post by JaviCAP
Lovely looking pedal Javi!
Haven't had a chance to do anything with mine, are these easy to drill then? :) Can't wait to put them to use! |
|
Administrator
|
Thanks, Alex!
Yes, they're easy to drill, even easier that the usual Tayda or similar ones. The only thing, is that they're a pain in the ass to screw :P. Did install a battery clip for eventual use, but i think it will always work on DC, not the slightest wish to open and close the box again :P BR |
|
Haha, they can be a PITA to screw I admit, but once you got it started if you treat it like a thread tap & 2 cw turns, 1 ccw it should clear some of the swarf & make it a little raiser. That's the theory anyway! Best advice is to assemble the enclosure for drilling, gives it strength. Punch your marked holes & just let your drill do the work. For deburring the holes, a deburring or countersinking tool is best, but a sharp utility knife blade will give decent results, or use a drill bit about two/three sizes bigger than the one you used to make the hole & just gently whip off those burrs! Guess I should have offered this advice at the beginning, but I didn't think sorry dudes! Would love to see others build pics too! Matt.
It's better to have it & not need it, than to need it & not have it!
|
|
By "raiser" I obviously mean "easier"! Touchscreen phones & fat fingers etc etc.
It's better to have it & not need it, than to need it & not have it!
|
|
In reply to this post by Milkit
Cool thanks for the advice!
Trying to decide what to build for it, will have to be some kind of fuzz methinks. Superfuzz maybe? Tone Bender? Rams Head Muff? Oh dear...! Should have some time next week, provided I sort out my office/desk/corner in time. |
|
Administrator
|
In reply to this post by Milkit
New info :P Today bought a bunch of sheet metal screws, and problem is gone! Even installed a fresh battery in the Big Muff!
So, if you're getting "PITA warning" when screwing these enclosures, just get some 1,8x8mm sheet metal screws, and for a few cents you'll open and close these enclosures in a matter of seconds. BR |
|
In reply to this post by JaviCAP
Hi - I got hold of a few of these and was wondering what you used for the graphics and text on your sweet looking muff?!
Cheers Jack |
|
Administrator
|
Hi j,
No big secret :P Hard steel wool (not sure if this is the correct name in english), to polish scratches, soft one to polish the whole enclosure, water slide decals to the logos, controls and so on, 4 coats of varnish and a careful "relic" with jmedium grain sand paper to age the finish and get some scratches and dings. The "relic" part is not needed, of course, but I supposed it could look fine in a vintage pedal model. BR |
|
Cool thanks for the tips - what kind of varnish do you use specifically? I've been using clear spray that i buy from Halfords in England but its about £8 a can and you end up seeing the edges of the waterslide decals. Also it tends to bleed the black ink a bit, although i have had some decent results. Any tips on how you go about the varishing, what type you use and the genral process would be much appreciated.
Cheers Jack |
|
In reply to this post by Milkit
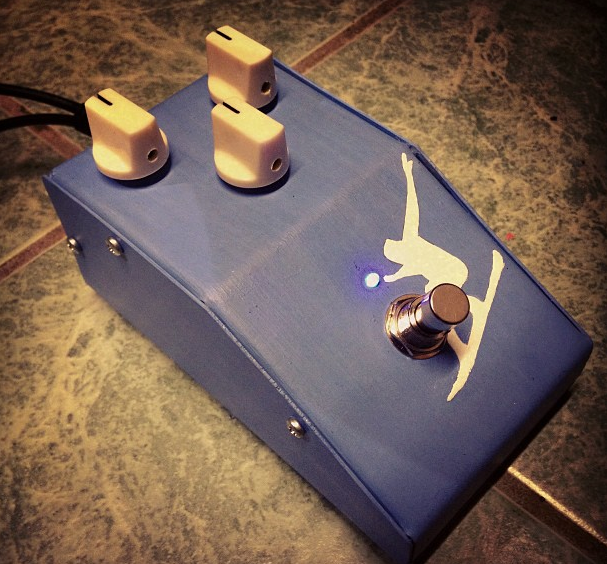 First build from your enclosures, more to come later! Hand painted by my lovely girlfriend who does all the fun artwork for me. It's a Bearfoot Model H. Cheers for the enclosures. I did not enjoy drilling them but that's just me haha!
www.pedalprojects.com
www.facebook.com/pedalprojects |
|
Cool Geiri, I like it!
More build pics alwways welcome dudes! 
It's better to have it & not need it, than to need it & not have it!
|
|
Administrator
|
Forgot to mention that I received the second lot :) Great as usual.
More pics? Here you have : 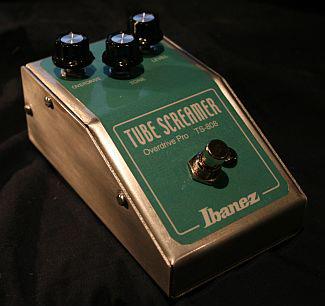 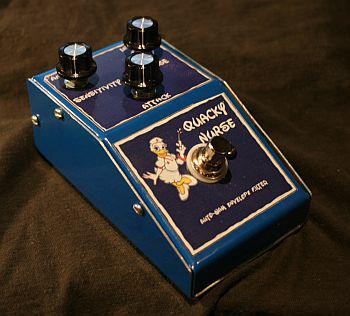 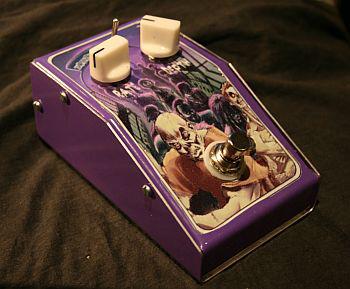 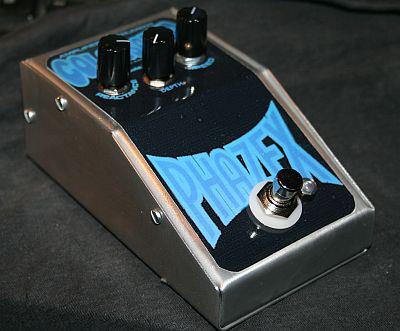 BR |
|
Marvellous mate!

It's better to have it & not need it, than to need it & not have it!
|
«
Return to Open Chat
|
1 view|%1 views
| Free forum by Nabble | Edit this page |


