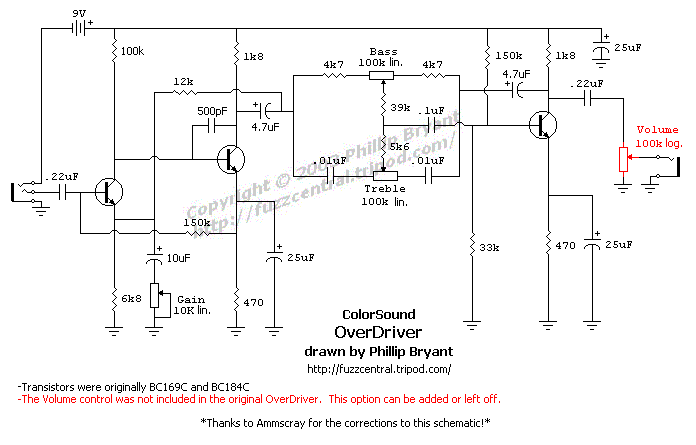
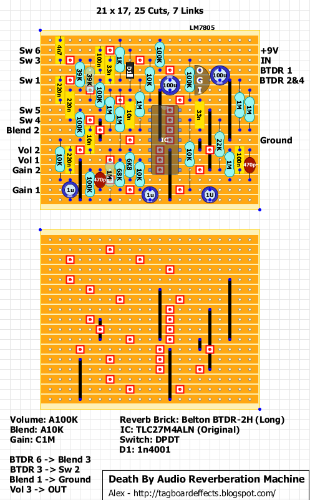
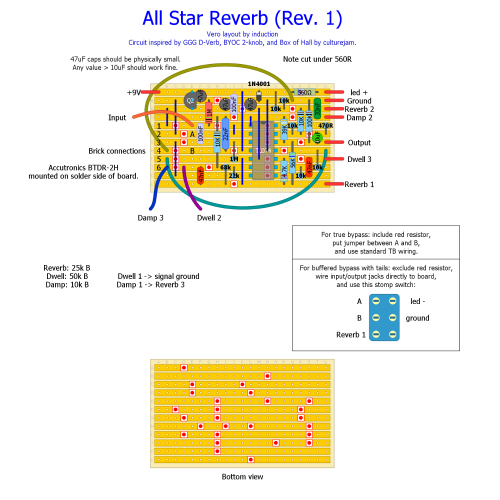
Newbie has switch dilemma, due to bad instructions.. Help!

12

12
Newbie has switch dilemma, due to bad instructions.. Help!

|
Re: Newbie has switch dilemma, due to bad instructions.. Help!
|
Administrator
|
Re: Newbie has switch dilemma, due to bad instructions.. Help!
|
|
Re: Newbie has switch dilemma, due to bad instructions.. Help!
|
|
Re: Newbie has switch dilemma, due to bad instructions.. Help!
|
Administrator
|
Re: Newbie has switch dilemma, due to bad instructions.. Help!
|
|
Re: Newbie has switch dilemma, due to bad instructions.. Help!
|
|
Re: Newbie has switch dilemma, due to bad instructions.. Help!
|
|
Re: Newbie has switch dilemma, due to bad instructions.. Help!
|
|
Re: Newbie has switch dilemma, due to bad instructions.. Help!
|
Administrator
|
Re: Newbie has switch dilemma, due to bad instructions.. Help!
|
|
Re: Newbie has switch dilemma, due to bad instructions.. Help!
|
|

Re: Newbie has switch dilemma, due to bad instructions.. Help!
|
|
Re: Newbie has switch dilemma, due to bad instructions.. Help!
|
|
Re: Newbie has switch dilemma, due to bad instructions.. Help!
|
|
Re: Newbie has switch dilemma, due to bad instructions.. Help!
|
|
Re: Newbie has switch dilemma, due to bad instructions.. Help!
|
|
Re: Newbie has switch dilemma, due to bad instructions.. Help!
|
Administrator
|

Re: Newbie has switch dilemma, due to bad instructions.. Help!
|
|
Re: Newbie has switch dilemma, due to bad instructions.. Help!
|
|


| Free forum by Nabble | Edit this page |