Wiring for Arctic White Fuzz

classic Classic list List threaded Threaded
63 messages Options
1234
Reply | Threaded
Open this post in threaded view
|

RE: Wiring for Arctic White Fuzz

rocket88
Administrator
ah, super easy man. if you take a look at the layout


you see how it says LED+? that means you're going to connect that to the positive leg of the LED. so if you look at the offboard wiring i posted earlier from the main site, you don't need to hookup the extra wire to the positive lug of the DC jack that would go to the resistor and positive leg of the LED.

some layouts have that built in, but most do not.

just remember, when wiring up the pots, switch, LED, and anything else, just follow what the layout tells you. what i mean by that is if you look at each wire it tells you what lug of the pot it goes to, and what lug of any additional switches, or if the LED can be attached directly to the board. the things that are not mentioned is the main on/off switch and jacks, unless noted.

oh, and remember that when you look at the pots how the lugs are numbered


if you do it backwards the pots will still work, but in reverse. for instance if you wire the volume pot backwards you're going to increase volume counter clockwise, and decrease volume clockwise.
Reply | Threaded
Open this post in threaded view
|

RE: Wiring for Arctic White Fuzz

falconfan
Just so I understand......I connect the wire 4 coming from my board to the + LED then what do I connect to the - LED....is it still going to connect to the resistor and go to the dc jack?

Sorry for my confusion....I know this should click with me....but there were just a couple of things that.I was unsure of...and for future reference....is it better to wire everything in the enclosure first then connect to the board? I know its probably preference...but Its been difficult trying to solder with the wires already in the board. Gets to be a jumbled mess...lol
Reply | Threaded
Open this post in threaded view
|

RE: Wiring for Arctic White Fuzz

rocket88
Administrator
correct. following the numbering mark made and posted for you wire 4, which is the wire on the top right of the board, goes to the positive leg of the LED. the negative leg of the LED goes to 1 on the stomp switch like normal. you don't need to wire the LED to the DC jack at all.

as far as how to wire everything up, it's a personal preference. everyone has their own way of wiring everything up. i actually add the wire to the board, pots, and jacks all at the same time out of the enclosure. the more you do it the easier it becomes because you'll be able to figure out wire length and board position without a whole lot of thought.
Reply | Threaded
Open this post in threaded view
|

RE: Wiring for Arctic White Fuzz

Ciaran Haslett
In reply to this post by falconfan
Hi falcon.  Welcome to the hobby.

As the lads have said, we all started this pretty green and had to learn as we went along.  Frustrating at times but definitely my most rewarding hobby anyway.  So as said, don't be afraid to ask questions if you're stuck.

That extra LED + wire coming from the board....

The more layouts you build from here you will soon see a certain style that lvlark and Miro prefer to use.  No standing resistors, nothing bigger than a 1590 BB box and of course the LED.  When there is space for an LED CLR (current limiting resistor) on the layout, they put it there.  This makes the offboard wiring for the LED easier as we can take its power feed from the board straight to the switch, without fiddling with a resistor "floating in space" somewhere in the enclosure.

So, you have already "floated" your CLR in your build so you can remove that LED + wire from the board and ignore it.  But for future builds, if you see a wire labelled LED +, I would recommend using it for you LED.  Just makes the boring bits of the building a little more bearable.

Good luck

Ciaran
Reply | Threaded
Open this post in threaded view
|

RE: Wiring for Arctic White Fuzz

Ciaran Haslett
oops...

Completely missed this running into 2 pages.  You're in good hands with Rockett.

All the best
Reply | Threaded
Open this post in threaded view
|

RE: Wiring for Arctic White Fuzz

falconfan
In reply to this post by Ciaran Haslett
Ciaran, Thanks for the info....that was very helpful and makes perfect sense. I'm going to try to finish this build tonight and hopefully have some luck and it will work....lol
Reply | Threaded
Open this post in threaded view
|

RE: Wiring for Arctic White Fuzz

rocket88
Administrator
In reply to this post by Ciaran Haslett
haha. ciaran, i hate when i respond to something and have no idea that it kept going. btw, thanks for the compliment, i'm always happy to be able to pay it forward for all the help i've got, especially at the beginning.
Reply | Threaded
Open this post in threaded view
|

RE: Wiring for Arctic White Fuzz

falconfan
In reply to this post by rocket88
Well rocket....I wired evrything up tonight and pluggef it in and........nothing.....no sound....LED did not light up.....getting pretty frustrated......I just dont know why it doesn't work.....ive vot a meter to check voltage but Ive never used one and dont knkw what voltage settings I should use to check everything....

Got any suggestions?

I could probably send pics of my terribly messy wiring job....but I dont know if that would be beneficial.....lol
Reply | Threaded
Open this post in threaded view
|

RE: Wiring for Arctic White Fuzz

rocket88
Administrator
No problem man. The first build is always the biggest bear, trust me. Don't get frustrated as hard as it is to do and say.

Post some clear pics of the top of the board, bottom of the board, and the wiring. Make sure it's as clear as you can get it.

Also, take readings of the voltages of the transistors. To do that you're going to turn the pedal on, put your negative lead onto ground, I use the screw holes in the enclosure, and put the positive lead on the legs of each transistor. You're going to want to write down the number and what leg of the transistor you're measuring, C (collector), B base, E (emitter), and D (drain), S (source), G (gate) for FETs. You'll know which is which by looking at the layout.
Reply | Threaded
Open this post in threaded view
|

RE: Wiring for Arctic White Fuzz

motterpaul
In reply to this post by falconfan
Just by the way - you are in good hands with Rocket, but I am just curious is you might have a bread board. Or did you wire in the footswitch and everything?

Once you have been doing this for awhile you figure out it is easier to just built the circuits and use a test box (or a bread board) to connect DC power and the 1/4-inch jacks for guitar in and (out) amp jacks. No footswitch needed (or DC jack or battery terminals). So, you can eliminate those as problem areas. It is easier to isolate the components that way.

But do post current pictures of what you have so far and I'm sure it will get sorted out.
Reply | Threaded
Open this post in threaded view
|

RE: Wiring for Arctic White Fuzz

falconfan
This post was updated on .
In reply to this post by rocket88
Hello everyone....I took a couple of weeks off for family vacation and other things.....I got quite frustrated when I wired this pedal up and it didnt work.....I guess I felt building pedals would much much easier....and my confidence took a dive on whether I could get this to work....but Im back and started a nee pedal - The Dyna Red Distortion pedal....

I have taken pictures of the board build.....but have not even attempted the wiring to the jacks and enclosure.....this seems to be my biggest obstacle....

I do have a few questions about the board. I have a new multimeter (pictured) but I have no idea how to use it or what voltage to set it on to get the right readings. I also dont know what I am trying to check for. I dont know which areas on the board that will show me the right voltage info....I could use some help here justbto verify that the board is correct.

I am posting pictures of everything that Im doing so you pros can check out my work and catch my mistakes...lol


Reply | Threaded
Open this post in threaded view
|

RE: Wiring for Arctic White Fuzz

tabbycat
hey falconfan, can you post a link to the layout you are building? there are a few variations of the dyna red.
Reply | Threaded
Open this post in threaded view
|

RE: Wiring for Arctic White Fuzz

Ciaran Haslett
In reply to this post by falconfan
Sorry to hear about the Arctic White.  If its any consolation I struggled with it too.  Its good to see you're moving on.  Later down the line you'll revisit your failed builds and discover you did something stupid.  We all have a drawer filled with dodgy builds that didn't work/work right and some time away from them helps.

Anyway...

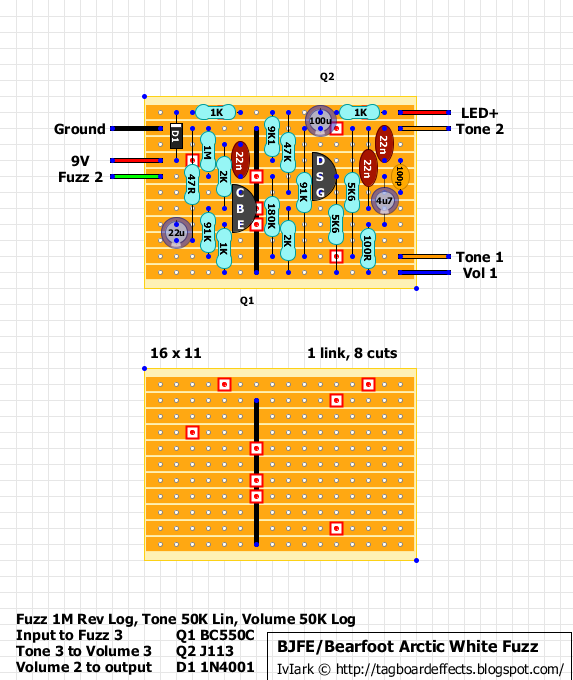
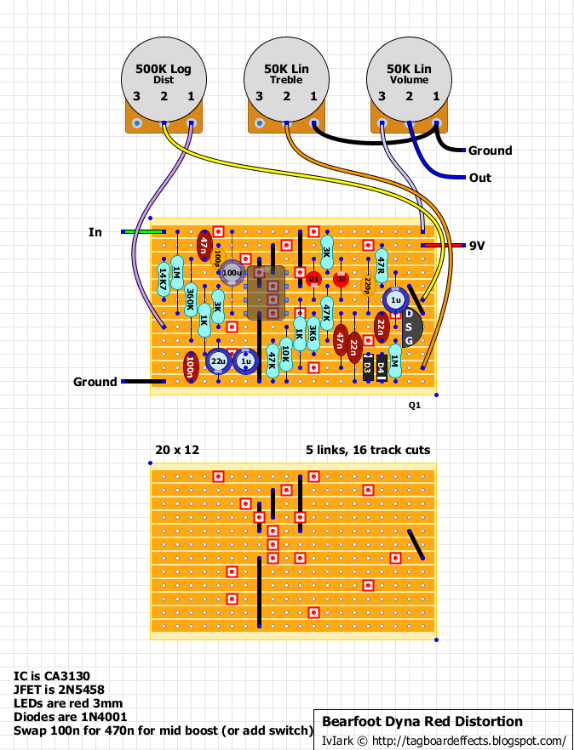
This looks like the one you're building.

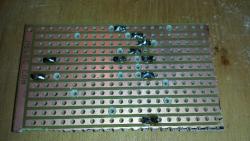
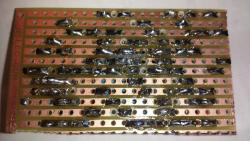
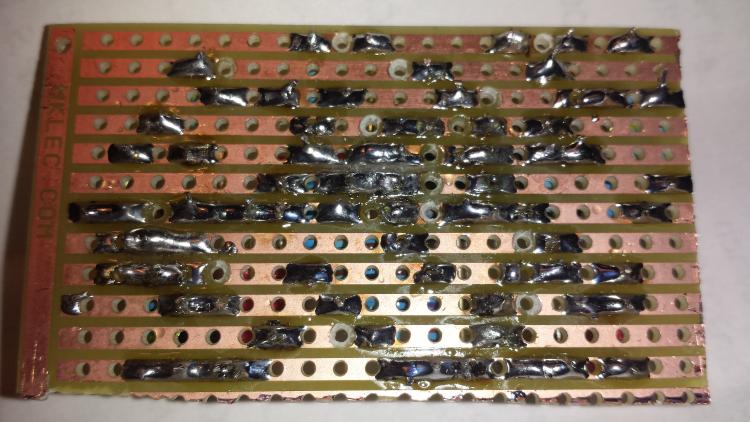
Your pics are very low quality making it difficult to spot any potential errors.  When inserting a pic for inspection, try to take the best pic you can, with no light glare and in a position where some components aren't hiding others.  Insert as max size.  Just makes it easier to compare with the layout.

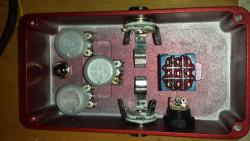
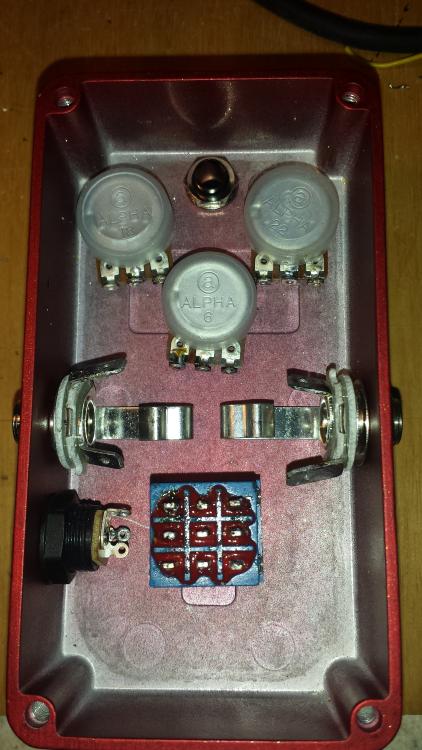
Having said that I can see one error which, with your use of sockets, is an easy fix.  Your IC is upside down.  The small circle (sometimes a half moon) on the IC tells you where Pin 1 is.  If you look closely at the layout you can see a light shaded half moon at the top of the IC.  So Pin one should be in the top left socket, not the bottom right.

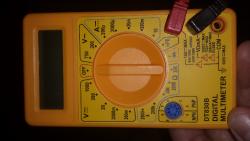
Your multimetre...Move the black probe to the bottom socket (this is Ground or Common)

You'll mostly be using 2 section...V--- (for measuring DC) and Ω (for measuring resistance and continuity)

For measuring DC, set the knob to 20.  This means it will read up to 20DC volts (most pedals are only powered with 9 volts) with better accuracy than measuring using the higher settings.  Put the black probe on a ground point and the red probe where you want to take a measurement.  You can work out what voltages you're supposed to have using Ohms law but the comments section usually has correct voltages posted somewhere.

Ω is for measuring resistance.  This is useful for checking each resistor is the correct value and actually works before you solder them in.  Again select the most suitable range depending on the value you are measuring for best resolution.  Touch one end of a resistor with one porbe and the other end with the other probe.  Doesn't matter which colour probe goes where.

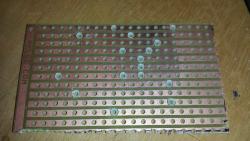
You can also check for continuity (electrical connection between 2 points) using the Ω section.  Take 2 tracks that you have linked together for example.  They are supposed to be linked via a jumper wire...so this means that there should be no resistance between those 2 tracks.  Put any probe one one track and the other probe on the linked track.  The metre should read 0 (or very close to it) if the connection is good.  If not you may a bad solder joint or misplaced the link.  

We can do the same thing to check for solder bridges/burrs of copper unintentionally connecting tracks or bridging cuts.  If the cut is fine there should be a high resistance reading.  If there's a bridge there will be a very low reading.

Hope this helps

Ciaran
Reply | Threaded
Open this post in threaded view
|

RE: Wiring for Arctic White Fuzz

falconfan
In reply to this post by tabbycat
Reply | Threaded
Open this post in threaded view
|

RE: Wiring for Arctic White Fuzz

falconfan
In reply to this post by Ciaran Haslett
Here are som ebetter pictures.....thanks for the advice on the IC....I will change that out tonight.


Reply | Threaded
Open this post in threaded view
|

RE: Wiring for Arctic White Fuzz

falconfan
In reply to this post by Ciaran Haslett
Ciaran,

Thank you for your explanation on how to use the meter....that was awesome....as for the arctic white fuzz.....I still have the board complete.....but need to figure out what is happening....whether it's the wiring.....something going bad in the board....or what....but I want to get it to work...because it was the first one I wanted to put in my pedal board to use...

So, I thought I would go ahead and try the Dyno Red and see if it would be any better....I have enclosed the diagram and bigger pics for you to see.
Reply | Threaded
Open this post in threaded view
|

RE: Wiring for Arctic White Fuzz

vid.sicious
Hey. Sorry to hear about your misfortunes with the pedals. I'm in a similar position and first 4 circuits I built just didn't work properly. I've figured out that I haven't been making proper ground loops and once I started doing it, the circuits actually started working. Now I'm having issues with biasing some fuzz circuits. It's pretty hard as there are no hFe specifications in the layouts so I guess people just have to play around. I've been doing it for days without much luck... I hope you figure out what's wrong with both of your pedals and I'm sure people here will always help you out (I definitely would if I knew what I'm doing haha).

Off topic:
How do you call those plastic sockets for backs of pots? I've got a bunch of pots and only one of them has got this insulation. I want to buy some but just can't find anything anywhere. By the way, I'm based in UK.
aka Dead Eye
Reply | Threaded
Open this post in threaded view
|

RE: Wiring for Arctic White Fuzz

Beaker
"Off topic:
How do you call those plastic sockets for backs of pots? I've got a bunch of pots and only one of them has got this insulation. I want to buy some but just can't find anything anywhere. By the way, I'm based in UK."


Most of us refer to them as "pot condoms", and as far as I am aware, cannot be bought separately. I am in the UK too, and buy almost all my pots now from Tayda in Thailand, as they are genuine Alpha brand, are super-super cheap, and come with the condoms fitted. Tayda also sell them without the condoms, for a few pence less should you need them.

Which fuzz pedals are you talking about - maybe we can help?
Reply | Threaded
Open this post in threaded view
|

RE: Wiring for Arctic White Fuzz

Silver Blues
There is a place you can get them separately, I don't remember where though.
Through all the worry and pain we move on
Reply | Threaded
Open this post in threaded view
|

RE: Wiring for Arctic White Fuzz

vid.sicious
In reply to this post by Beaker
Hey Beaker, thanks for suggestion, I thought that Tayda was based in US. I'll definitely look into it. It's probably worth waiting a bit longer for cheaper products.

As for my builds, I've got a separate thread going which you can find by following the link below:
http://guitar-fx-layouts.42897.x6.nabble.com/Every-circuit-oscillates-tp23517.html;cid=1439493120863-162

Any help would be appreciated.
PS.: Sorry for hijacking your thread Falconfan. All the best to you!
aka Dead Eye
1234